
Happy new year everyone – but look at that crispy new diary on your work desk, all black and plain 🙁 How about we give it a facelift? 🙂
My good buddy Samantha Molloy is better known as Stitched Up Sam, an expert in free motion embroidery. She whizzes up the most amazing pictures by sewing freehand on her sewing machine. It’s astounding to watch her work as she whips up portraits of people like David Bowie and Blondie in no time.

A few years ago Sam was kind enough to give my mum and I a private lesson in free motion embroidery. It’s really quite bizarre to freestyle on a sewing machine moving the fabric around randomly as the needle bounces up and down without the fabric being gripped by anything except your hand. I made a hot air balloon picture and my mum made this fantastic sewing machine which she gave to me. It has pride of place in my sewing area.

It’s a while since I did any free motion so I thought I would jazz up my work diary with a nice new cover. If you’ve read my column before you’ll know I love Minis, so I’m going to try to free motion a Mini we got on a Christmas card. Firstly I laid the open diary flat on a piece of A3 paper and drew around it. I then drew around the diary outline leaving a seam allowance across the top and bottom and adding a bit extra for a flap on each side. I then cut that out to give me a pattern for my cover.

I then cut the pattern out of two pieces of fabric, one for the exterior and one for the lining and ironed some interfacing onto the back of the exterior fabric in the area where I wanted to free motion. Making the fabric stiffer makes moving the fabric around easier when you are doing free motion embroidery.
I photocopied the Mini a few times and cut it into the basic shapes needed to put together a mini pattern, I chose to do the main body, the windows, the wheels and the hub caps. Then I chose some fabric and cut out the shapes in fabric.

Now the next bit is the worst bit for me. Bondaweb – which is used to stick fabrics together to keep them in place for sewing – is my absolute nemesis. Every time I use it I end up doing it wrong, I either get glue everywhere or nowhere no matter what I do. But I always get there in the end – so reluctantly I got the Bondaweb out. Piece by piece I put my Mini bits on it and then layered them up on the backing fabric, first the body of the car, then added windows, then tyres, then the wheel trims. I actually got the Bondaweb to work properly first time this time, I’m still in shock… It’s a great idea to save all of your scrap fabric from other projects if you’re going to do free motion. I used scraps to cut the little detail bits. It always amazes me what I have in my scrap box and how well it can work, in this case the little stars for the hub caps.

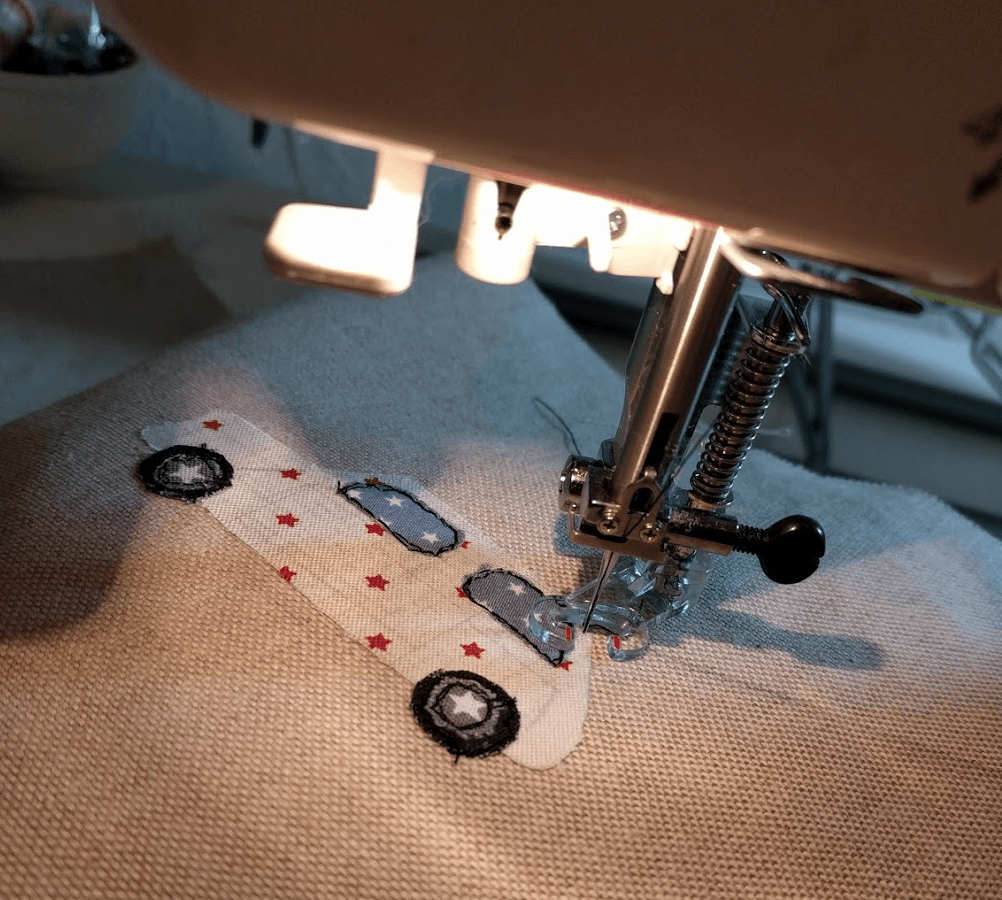
Now for the fun bit – freeeeeeeeeestyling on fabric! To free motion something you have to programme your mind to not sew in perfectly straight lines, not to panic when the fabric runs free in weird directions, and to not think too much about what you’re doing when it’s going well because that’s when it starts going wrong (for me anyway). I lowered the feed dogs on the machine (the metal grips where the needle goes down into the fabric) so the machine doesn’t grab the fabric the way it usually would, this is done on my machine using a switch on the back. Then I switched to a special free motion embroidery foot, it’s a weird shape and it bounces around lots more than a normal foot would. Everything basically runs wild and it’s down to you to wrangle it into making beautiful shapes. I sewed around all of the elements of the Mini, going over everything at least twice. The lines aren’t meant to be on top of each other on every round you do, as I say, you run free.

The key bit now is don’t forget to raise the feed dogs again and change back to a standard sewing foot before you move onto the next bit. Nobody wants to free motion a seam closed… I took both pieces of fabric, lined them up right sides together and sewed them up leaving a gap for turning. I then turned them around the right way and sewed closed the gap. I then laid my diary onto the fabric again to make sure it fitted properly. Each side should now be too long. This allows for these bits to be folded back to become a slot for the diary to go into as shown. I then sewed the top and bottom of the slots closed and there it was, my funky Mini start to 2019. I’m not 100% happy with how the top of the door has come out but otherwise I’m pretty happy as it’s only my third attempt at free motion. I think I’ll try to make a bigger version of the Mini for a cushion now so there is more room available to play with that tricky door frame.

If you’re thinking of having a go at free motion you can read more from Sam on her blog here and peek at her lovely Etsy shop here. She teaches classes at a few locations so it’s worth keeping an eye out for that if you fancy learning a new skill. She has also kindly written some free motion top tips specially for you.
She says…
– Practice on some scrap fabric first and try just doodling with your sewing machine. It takes a little while to get used to the feeling of not having to sew in straight lines.
– Relax; if you’re tense you’ll find it much harder to move the fabric smoothly under the needle.
– If your machine allows you to stop sewing with the needle down in the fabric, use that feature. It prevents the fabric from being able to jump to one side when you stop sewing.
– Your piece doesn’t have to look perfect, or like it’s come out of a factory. Wobbles and imperfect lines are good! Try to incorporate any wobbles as a design feature rather than worry about them. Stitching over each line twice can help to hide little areas where you’ve gone slightly off course.
– Experiment with different fabrics and thread colours. Most importantly, have fun!
Have you ever tried free motion embroidery? What did you make? I’d love to see.
Best song to free motion to: I Want to Break FREE by Queen (see what I did there?)
Best cake: Any type of gluten FREE cake (that’s it for the free motion jokes for now…)
- Costs:
Fabric for the cover: £2 remnant
Fabric for the Mini: Freebie scraps from other projects
Free motion embroidery foot: £5
Total: £7 but you’ll always have the foot to use again – and free motion is addictive!