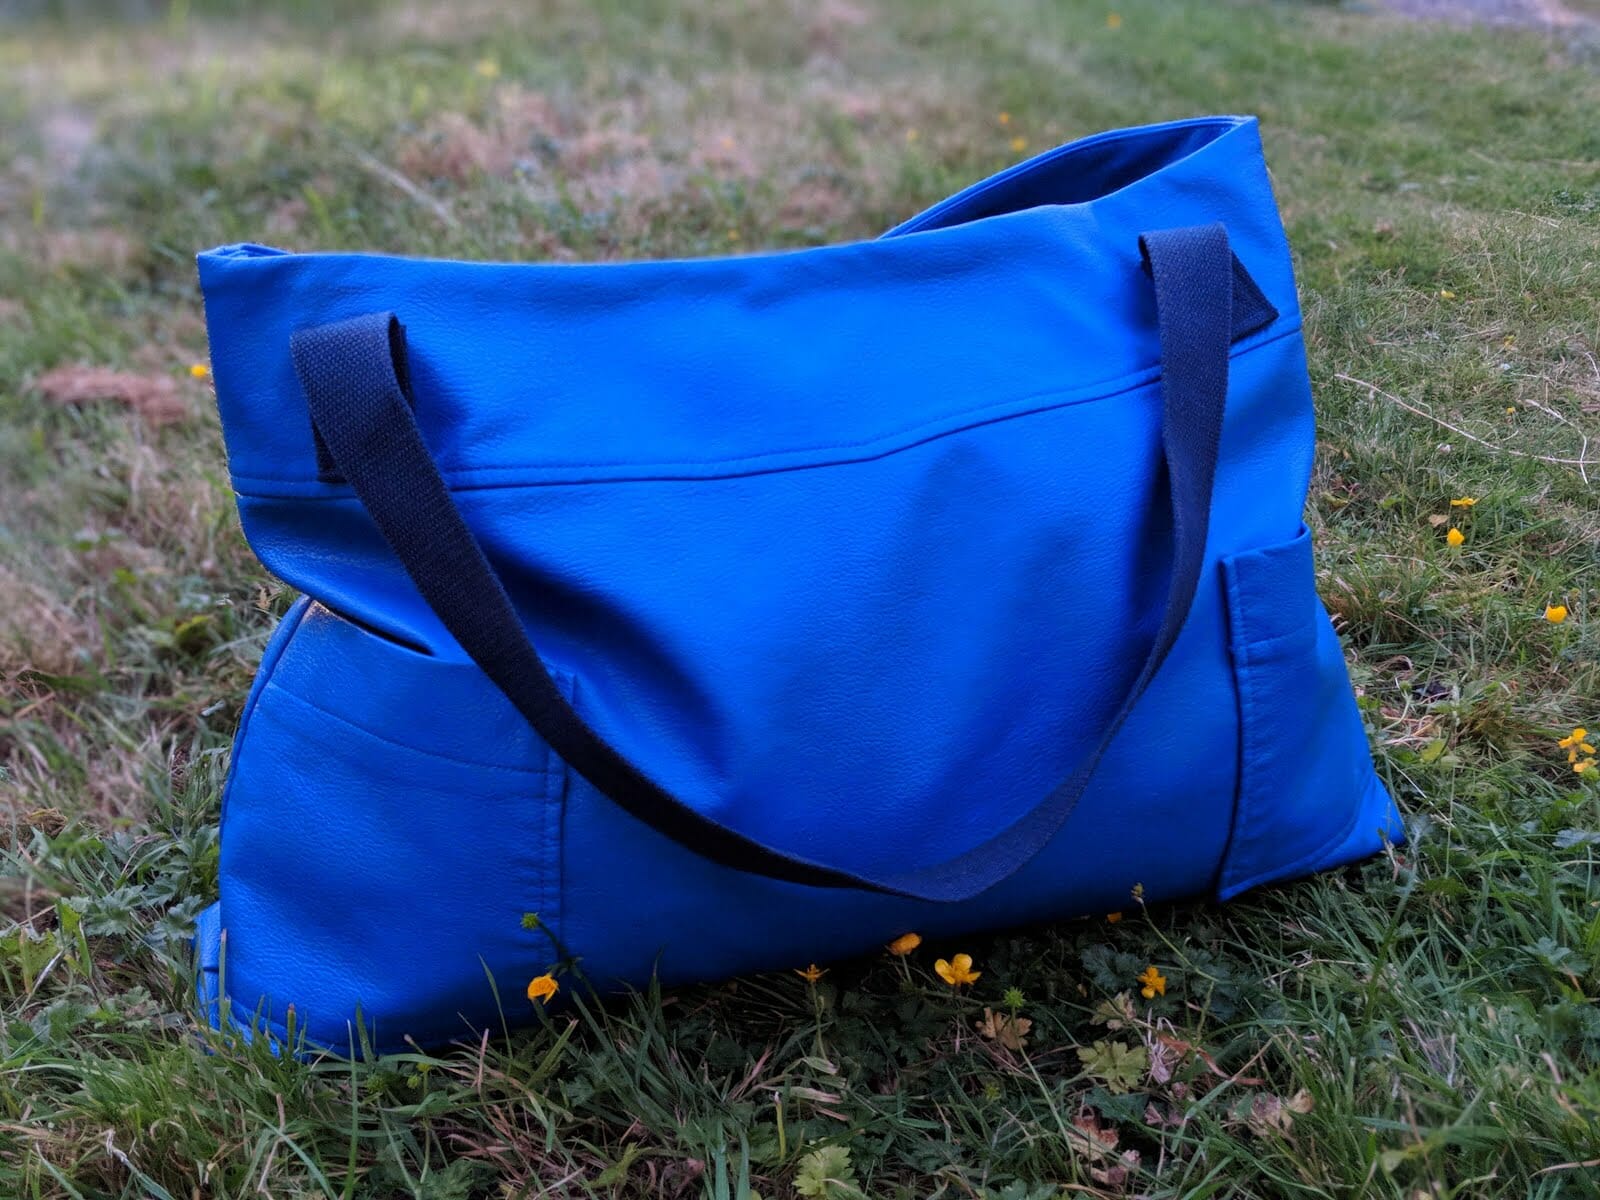

It was love at first sight, the rock star blue (fake) leather, the fabulous lining, the huge pockets – it had to be mine. But it was a skirt and I don’t wear skirts, so I put it back… But it was a fiver in the sale, so I took it – that skirt would make a fabulous bag! Now I just had to figure out how…

The first thing I did was to get the seam ripper busy by removing all of the shop labels inside the skirt. I then unpicked the hem joining the bottom of the skirt to the lining.

I sewed the zip down the back of the skirt shut so it wouldn’t open and spill out the contents of my bag. To do this I sewed backwards and forwards by hand just below the zipper pull while it was shut so it couldn’t move. Although the skirt was quite short I felt it was too long for a bag. So I measured a few inches up from the bottom of both sides, drew a line across with a ruler and cut off the bottom of the skirt.

I love pockets. The skirt already has two massive ones on the front, but you can never have enough so I used a fat quarter of funky yoyo fabric to make one for the inside. I cut a rectangle of fabric twice the size of the pocket I wanted, folded it in half right sides together and sewed it up leaving a two inch gap along the bottom. I turned it the right way round through the gap, gave it a press and sewed it onto the lining, closing the gap at the same time.

At this point you could just sew the bottom of the lining and outer fabric closed if you want a flat tote bag shape, but I wanted to make it into a wide box bottom bag so I could fit more in. Starting with the lining I laid the fabric flat on the table right sides together and sewed across the bottom, again leaving a gap for turning. I left a gap of around five inches in the lining as the outer fabric is quite thick and the whole bag was going to have to turn through the hole. Then I sewed the outer fabric in the same way, right sides together, but you don’t have to leave a hole when you sew up the outer fabric. Because the outer fabric was thicker I used sewing clips instead of pins to hold the outer fabric in place.

Once I had done that I took a corner of the lining, held it so the side and bottom seams were on top of each other and pinned them together flat. I then ruled along the corner where it was three inches wide, at 90 degrees to the seams, and ruled a line across.This is best shown in the example photo of the outer fabric below.

I sewed across the line I had drawn and then – this is the scary bit – cut the corner of the fabric off. I repeated that with the other side of the lining and both sides of the outer fabric.

I then turned everything the right way round again through the gap in the lining and sewed the gap in the lining shut. Then I had the box base of the bag.

For my handles I opted for canvas webbing. It’s easy to sew, easy to attach and looks great too. I bought two meters of it on eBay for £3.50. I then cut them to the length that suited the bag allowing two inches at each end for attaching. I folded each end in an inch and another inch again so the rough end of the canvas was enclosed, and sewed them to the bag by going around the end in a square and then sewing diagonals across the square for extra strength, this is best demonstrated on the photo of the lining below.

And the bag was finished!

The beauty of this crazy creation is you can make a bigger or smaller bag simply by buying a bigger or smaller size in the skirt – and if you decide you want the skirt back you can just cut off the bottom of the bag, hem it, free the zipper and it’s back. Shorter, but back.
I hope you enjoyed this column and you’ve got some skirts in your wardrobe you’re going to have a go with. If you’ve got any comments, questions, hints or tips to share please add them in the comments box below. See you next month!
- Best song for this craft: The Pretender by the Foo Fighters
- Best cake: Lemon drizzle
- Project costs
- Skirt £5
- Fat quarter for the pocket £3.50
- Webbing £3.50
- Total £12
—–