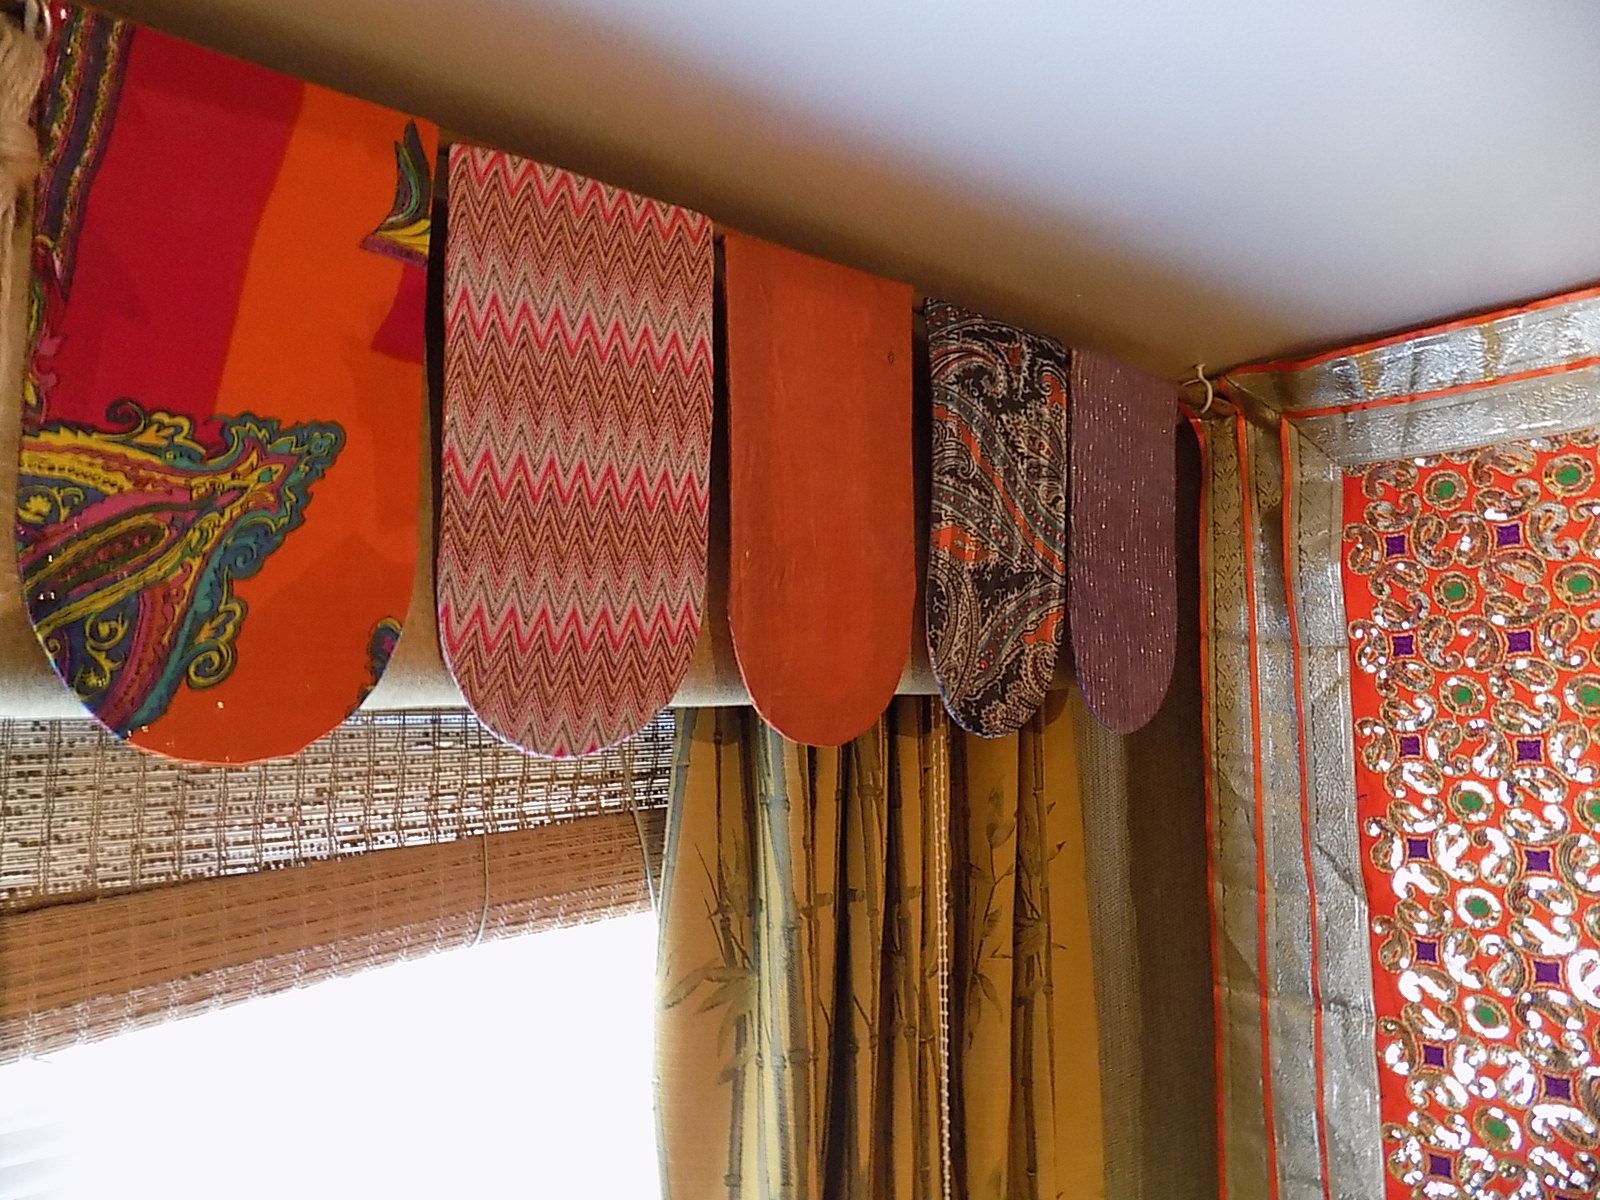
Here is my modern version of the original window pelmet. I have taken inspiration from my stash of Indian fabrics to inject colour and pattern into my decor throughout the house, to decorate windows and doors.

What You Need
Before you start you will need to collect:
- Thin cardboard for templates (I use the inserts from large cat food boxes and delivery envelopes)
- Parcel tape
- Scissors for both cardboard and fabric
- Needles
- Strong thread
- Lots of pins
- A selection of fabrics large enough for your template
- Bamboo rail, two hanging hooks per rail, drill and ceiling plugs (to suspend securely).

Make A Template
Decide where you are going to place your hanging for scale. The larger the template the more fabric you will need. Play around with shape and cut one template to try out. I took inspiration from my Vibrant Buddha Temple textile wall hanging.

I used a cereal bowl to create the rounded edge. When you are happy with it duplicate, creating two pieces per panel and secure with parcel tape to maintain shape, strengthening any perforated or folded areas. Two layers of thin card is easier to cut and lighter to hang.

Choose Themed Fabrics
Select your fabrics according to size (allowing excess to turn over edges of template), colour, pattern and theme. Avoid thick fabrics which are difficult to fold a neat edge and transparent fabrics (you do not want to see the template underneath). Cut fabrics using template, allowing excess. Keep your off-cuts for future projects.

Keeping the pattern central, wrap edges around template and secure to back with parcel tape, making it ready for sewing. Alternate opposites for an even tension. Create neat corners by folding and tucking under with a sharp corner point.

Roughly stitch inner edge to secure back of fabric, working from a central point to the opposite side, keeping it taut for an even tension. If you pull too tightly you will bend the template. You do not need to colour match thread as this will be hidden beneath the backing fabric. Use long lengths and a strong thread (to avoid it breaking). To secure the end simply over sew several times without pulling the fabric. Leave the tape in place for additional support where fabric is bound to template.

Rounded edges will require some folds, to be over sewn as flat as possible.

You may need to pull back the tape from straight edges in order to stitch corners. A neat stitch is not required but a flat fold is. This is why thick fabrics do not work effectively. Do not remove tape because this will weaken the tension already created within the surface of the panel. Flatten as best you can. It will be covered by the backing fabric.

You now have a neat front panel ready for backing.

Add Backing Fabric
If you are placing panels above a door or window your backing fabric will not be seen. Select a plain colour to complement your overall theme. I have used shot silk in a rust hue (recycled curtains). Cut around your template leaving enough excess to turn under.

Pin one straight edge and bottom to create a starting corner (folding to create a sharp point).

Pin the curved edge to secure, ensuring an even distribution of fabric across the template.

Starting from the bottom corner, pin the backing fabric along the straight edge and bottom, alternating for an even tension. Pinning into the cardboard template will secure fabric. When you reach the other side, turn under and create another sharp corner and continue pinning for an even tension throughout.

You may have to edit several times for a neat finish at the curve, working from the mid section backwards and down along the straight edges. Trim if you have too much excess fabric to fold under. Try rolling your fabric under for a neater curved edge.

When you have an even tension throughout you are ready to stitch the edges together. Over sew, removing pins as you go. A short thread length will prevent getting tangled in the row of pins. To finish and start a new length undo some pins and secure to the turned under fabric which will not be seen.

Attach The Hanging Rail
When you have the required number of panels for your space, arrange against the bamboo hanging rail (already cut to size). Allow enough room for your bamboo to sit in the hanging hook and start stitching from the back panel directly onto your rail using a double thread and long length, over sewing in one direction, holding the panel in place with one hand and sewing with the other.

Repeat until all panels are secured and evenly spaced with a small gap between them so that they will not touch when hanging. Remember to allow enough space for the other end to hang in the hook.

Drill and plug ceiling. Screw in hook and hang rail at one end. Mark your other end and repeat. Stand back and admire your work!
I have chosen to display in front of my curtain pelmets. I have a neutral backdrop for the vibrant colours and patterns to really pop.
I do hope you are inspired to create your own panels. It’s a great way of changing the look of a room.