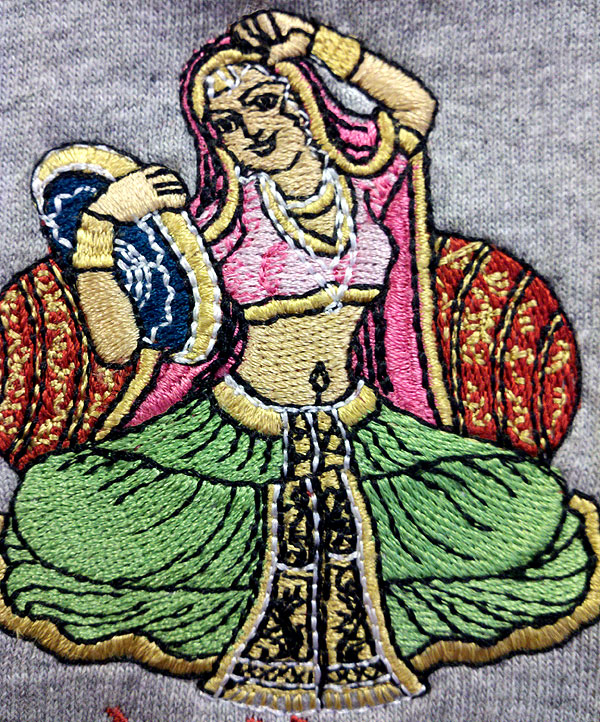

One of the unsung qualities of the proficient embroidery digitizer is the ability to properly ‘path’ designs. Pathing refers to controlling the journey of the needle through the design. This sequencing the elements, controlling the start and end of each element, and the skillful plotting of what are commonly referred to as ‘traveling’ stitches (small, well-hidden runs of short straight stitches that tie together elements in the same color without trimming or slowing to jump.) To illustrate, in the design below, each color is a single piece of thread except the final white accent color, which is 3 pieces.

Pathing experts can control these disparate elements, creating designs that minimize stray movement, use each color the minimum number of times necessary, and move sensibly through the design as efficiently as possible without compromising the artistic integrity of the interpretation. Everyone loves digitizers who expertly draw with stitches, use the right textures and colors, and balance their densities, but a digitizer who can also thoughtfully ‘path’ can work magic in the sewing field.
In the commercial embroidery world, reducing stitch counts and keeping machines moving at the highest reasonable speed is a sure way to increase profits. It’s no surprise why pathing is important there, but you may not know that improving pathing can be just as beneficial to home and art embroiderers. Let’s start by discussing the simple example of straight-stitched single-color embroideries like blackwork and redwork.

We know that one line of straight stitches is roughly .4mm thick, and that 2 passes over the same line will give us .8mm- to control the thickness of our lines, we must to travel precisely through our designs, passing over our path only the number of times necessary to build lines to their intended thickness. If we leave a line after too few passes, it will too thin; if we backtrack to get to another section of our design and pass over a line too many times, it will be too thick. It’s easy to see where pathing is critical when we make such designs with a single winding filament of thread. Some things are best shown with a simple design- the virtual run of the Anglo-Saxon early medieval design below shows how a design with a single line weight can be cleanly pathed.
Pathing is also critical when embroidering unstable materials. Persistent ripples and puckers surrounding designs on thin or stretchy fabrics drive embroiderers to distraction. Overly dense stitching or lax stabilization can cause these problems, but a frustrated embroiderer may go to extreme lengths to combat this distortion, using too much stabilizer and hooping too vigorously only to find that they can’t tame it on the machine. In these instances, the culprit may instead be poor pathing.

The direction in which stitching ‘moves’ is important; as elements stitch, they push a ‘wave’ of fabric before them. If a digitizer lets an element stitch toward an previously stitched element securely married to the stabilizer, the new element will trap that ‘wave’, ‘pinching’ the fabric against the secured area, forming and fixing a ripple.
Careful pathing can help mitigate this problem. Imagine the substrate as a tablecloth you are spreading flat. By starting your embroidery in the rough center of the design and ‘pushing’ away from that center point, you can smooth the fabric toward the edges of the design leaving a flatter finish. This won’t eliminate all distortion, but combined with balanced, light densities, it will allow the embroider to use less stabilizer and see a reduction in rippling.
Luckily, pathing isn’t as difficult to learn as it may seem. The easiest way to practice is through analog coloring; print out art for a prospective, grab your colored pencils, and start pretending to be an embroidery machine. Keep in mind the reasons why we sequence and path the way we do and to implement them while you color. No one pathing method is perfect for all situations, but knowing why and how to change your sequencing can allow you to adapt for any situation.

Here are some guidelines for your initial coloring exercises:
- Avoid picking up your pencil. Color and connect as many areas as you can in each color without lifting the point. Remember that embroidery is three-dimensional and think about how to hide ‘traveling stitch’ lines under elements stitching later in your design. If you must ‘jump’ from one area to another- make a mark to note the jump. You may find a way to avoid it as you color later overlapping layers.
- Start with large areas, but color ‘back to front’. Remember where you will need things to overlap to promote a sense of depth or to maintain registration. A filled area with a border should have the fill area colored first, as the border will overlap the fill when the design is stitched.
- Use each color as few times as you can. It’s efficient to avoid color changes or rethreading no matter how many needles your machine has. The first few and last few stitches of a color change are often when things go technically wrong. Avoid color changes, but don’t go overboard. Sometimes you need to change colors and stay in one area of a design to avoid problems with registration that crop up when you ‘travel’ too widely before returning to an area.
- Remember the tablecloth. – Where possible, don’t color ‘toward’ existing colored areas. Remember that in stitching, this will ‘pinch’ your unstable fabrics.
Pathing might not be the sexiest part of digitizing, but when properly done, it makes an immense difference to the way your designs run, how long they take to finish, and how your pieces look and drape. Watch some well-made stock designs run virtually in your software and in thread, then color a few of your own concepts. You’ll take that visceral feeling of following the needle with you into your digitizing; with practice, pathing will become second nature.

