My experimentation usually starts when someone asks me a surprising machine embroidery question; this project was entirely based on one of my many stitchy friends assuming I knew how to digitize the newly popular ‘pixel art machine embroidery’ he’d kept hearing about. Though I hadn’t made this particular style previously, being the old geek that I am, I was immediately aware of what they wanted to achieve. I’ve whiled away more than my fair share of hours both playing 8 and 16-bit games as well as creating pixel art both for fun and for game projects in my artistic infancy. Pair that with being a fan of retro games, retro design styles, and pixel-art in general, and you can imagine that I took notice when seeing the recent wave of merch embroidered with the video game protagonists of my partially misspent youth.
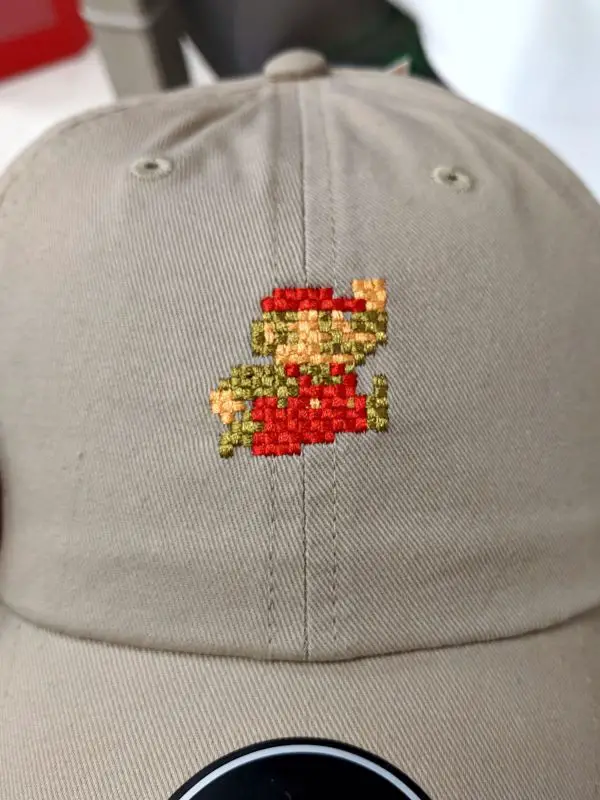
Frequenting any store that features caps engineered to grant you that old-school geek-cred means you are likely to see any number of embroideries that not only feature pixel-art, but render it with an interesting texture that makes it more than just a visual reproduction of these venerable sprites. This texture gives pixel art a unique quality and provides a tangible reason to choose the medium of machine embroidery to render it. For the purposes of this post, I’ll describe what characterizes this textured pixel-art style and follow up by explaining how I achieved it in my own experiments so that you intrepid embroiderers can adapt the style for your own pieces.
Talking Texture
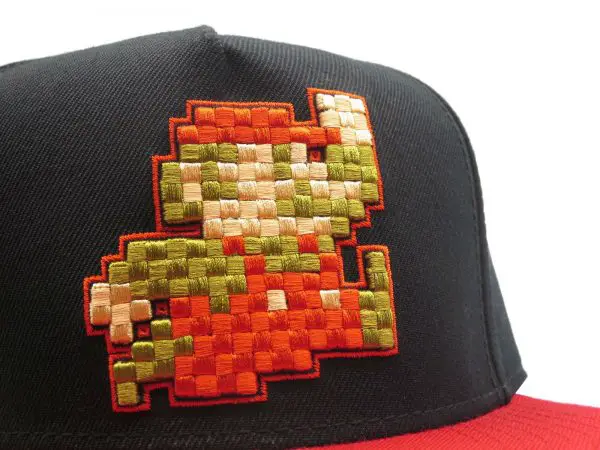
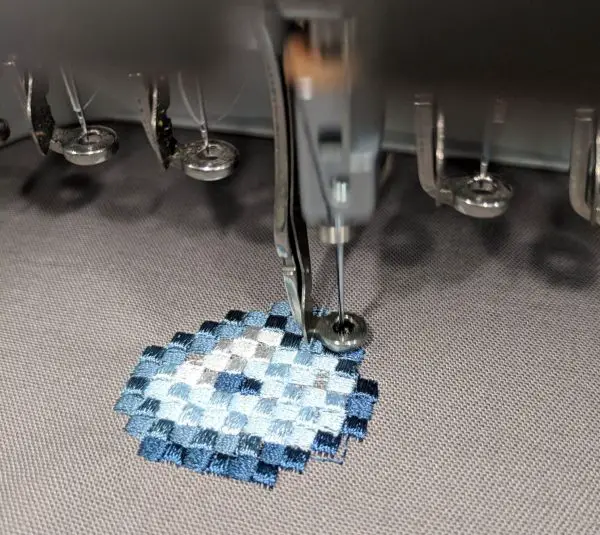
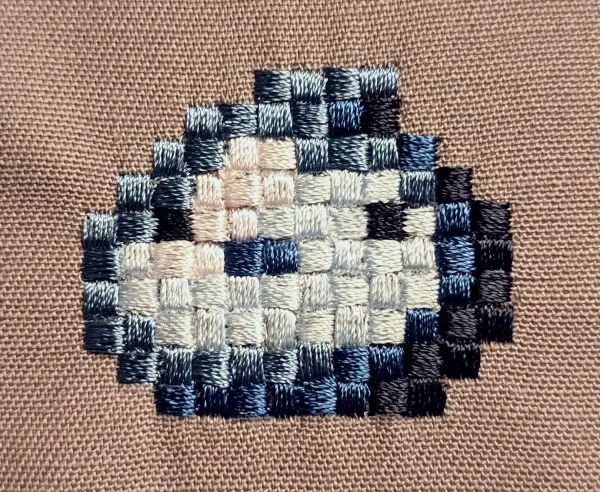
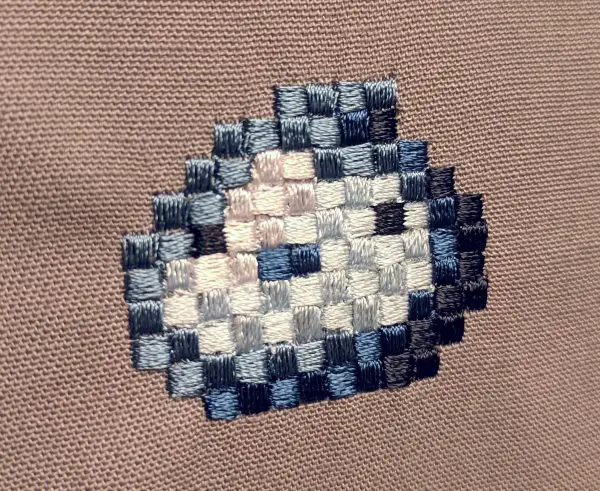
What makes this embroidery style special is its texture. In this case, it’s the play of light over the ’tiled’ area of the design, directed by altering the angle of stitches in each pixel to make a mosaic-like arrangement of reflective surfaces, shadows and edges that emphasize the pixel as the base unit of the art. Simply put this style represents each pixel with a block of shiny satin stitches set either horizontally or vertically with its angle offset from any neighboring pixel by 90 degrees. This full offset makes each pixel reflect light at a different angle from neighboring pixels, causing a slight color variation between even pixels of the same thread color set in a field of such units. This effect creates a slightly pebbled, faceted pavement that dances in as light passes over its surface.
Pixel Art Preparation
Before we create and digitize our own piece, it’s important to know one thing; Each of the pixels may be slightly different in shape due to their position in the sequence and therefore will need to be manually created to get solid coverage and to come out as the right size and shape when stitched. This means that the more detailed a piece is (think 16bit styled art vs 8bit art), the more labor there will be to execute the design. You will be able to recycle some pixels, but at no point will this process be automated; each square will be drawn and will have manually added compensation for push, pull, and proper overlaps to prevent gaps. With that in mind, your other concern is for the size of the pixels, We want to avoid overly tiny pixels that are hard to execute and don’t adequately reveal the texture we’re after as well as pixels so large that our satin stitches are overly long and loose. I settled on making the pixels in my piece 2.5mm square.
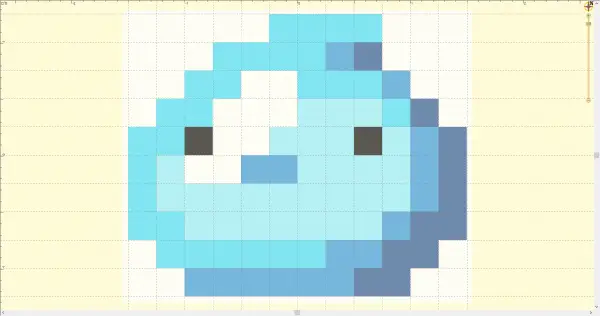
Being an RPG fan, I decided that a classic slime character would be a fun and simple design to sample for this project. Many thanks to Calciumtrice, the contributor who produced the original animated slime sprite I chose to use from OpenGameArt.org, linked here. I grabbed a standard pose from the sprite sheet and resized it to make sure my pixels were 2.5mm, setting any necessary custom guides in my StitchArtist window, and ensured that the slime was the desired size of my finished embroidery.
Down to Digitizing
Once I had the art in place, it was time to digitize. As I would potentially stitch this piece on caps, I wanted to sequence it from the bottom center of the design moving out toward the edges and up toward the top, so as to spread out the unstable crown of the hat. Though I didn’t sample on a cap, I did this to future-proof the design for cap embroidery. I decided to fill the largest area of the slime first, the medium blue, starting at the bottom row of pixels in the center of the design. Because the art didn’t show pixel boundaries, I set my grid size to 2.5mm in software and aligned the pixels to the grid to give me clear guidelines as to where I wanted the finished pixel boundaries to land. This becomes rather important as we start to digitize the pixels in sequence.
Tug of War
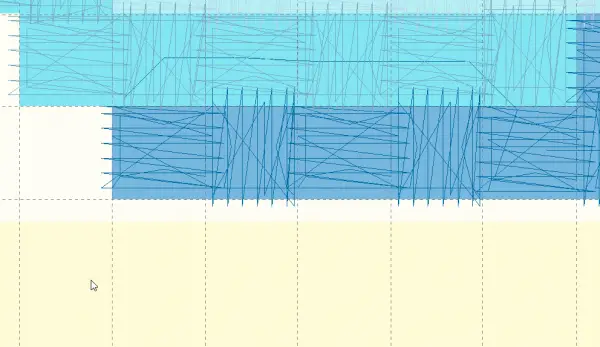
The trick to even coverage is that for each pixel you digitize, you want it to extend in the direction of the stitch angle underneath the adjacent pixels that will stitch after it in the sequence so that after the design runs and the stitches naturally get shorter, the pixels won’t separate. In the dimension of Push, perpendicular to the stitch angle, you want to pull the edges of the pixel slightly back as the lengthening of the satin stitch column will extend beyond the on-screen shape, particularly if the ‘open’ end of the current pixel will be on top of an existing stitched pixel. Also, whenever you encounter an edge, the same compensation rules apply; you’ll carefully have to balance push and pull so that when the open ends of the pixels push out toward the edge of the design and the closed sides of the design pull in away from that edge of the design that they meet in the middle to give the line of pixels on any given edge a clean line with no pixel sticking out or dropping within the intended edge. This means that the shapes you draw will actually be rectangles, extending on one or both sides under a later pixel or beyond the intended edge of the design, but refraining from going all the way to the line where we want the open sides to land.
Drawing, Traveling, and Duplicating Pixels
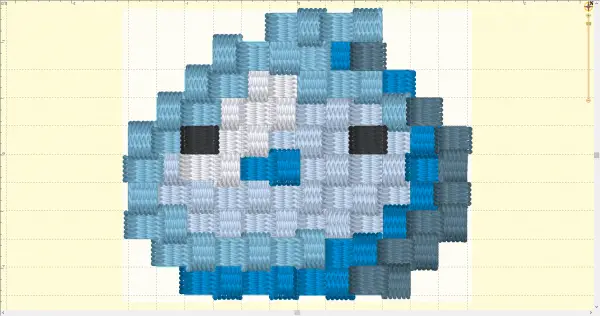
In my piece, most pixels are drawn with between .17 and .25mm of pull compensation on each side, making a standard pixel a rectangle close to 2.1mm by 2.8mm, with extra compensation where another pixel will cover, and less for the pixels stitched with all 4 neighbors already in place that only need slight compensation to stay square as the earlier pixels have the overlapping area covered on each side. Knowing that, all you have to do is keep rotating the pixels and adjusting, making sure that every pixel’s stitch angle is 90 degrees off from it’s neighbor and paying attention to make your start and endpoints match up for easy travel from one pixel to the next. If you are like me and trying to work from the center out for caps, as you hit the end of each row of pixels, you’ll create a line of stitching to travel back to center before filling the next row up. Once you have the basic pixels and know your sequence, you may be able to carefully copy and paste individual pixels or sets of pixels and moving them into place to continue your fill. So long as you are mindful of the pathing (entry and exit points for each shape and traveling stitches) and you are clear about where pixels fall in the sequence, all you have to do is remember to offset rows so that no pixel as another pixel to the top, bottom, or sides with the same stitch pattern in order to arrive at the checkerboard pattern that lends these designs their textural interest.
Endgame
After all was said and done and my sample was stitched, I couldn’t have been more pleased to see how this relatively simple technique could transform a literal blob of color into a highly textural and quite attractive piece of embroidery. When viewed ‘in the thread’ on a moving body, the sparkle of the alternating pixels is lively and intriguing, lending even the simplest shapes a sense of motion. Though it’s perhaps not the fastest technique to execute properly, nor the right answer to most art one will encounter, it is nonetheless worth taking time to play with the concept. In the end, you’ll have results that make these old-school designs more beautiful than even the lens of nostalgia can make them without attention to your craft.
Erich Campbell is an award-winning machine embroidery digitizer, designer and a decorated apparel industry expert as well as an industry educator appearing at several trade-shows as well as teaching online. He frequently contributes articles and interviews to embroidery industry magazines such as Printwear, Images Magazine UK, and more as well as to a host of blogs, social media groups, and other industry resources.
Erich is an evangelist for the craft, a stitch-obsessed embroidery believer, and firmly holds to constant, lifelong learning and the free exchange of technique and experience through conversations with his fellow embroiderers. A small collection of his original stock designs can be found at The Only Stitch


