Distortion in Digitizing
In this post, we’re going to continue to tackle that scourge of all new digitizers, the distortion of the the on-screen design that happens when the design is stitched. In the last post, we covered the first of the two major types: ‘Pull’ distortion.
Continuing on the theme, we’ll define and declaw the other half of that terrible twosome of machine embroidery mayhem – Push Distortion.
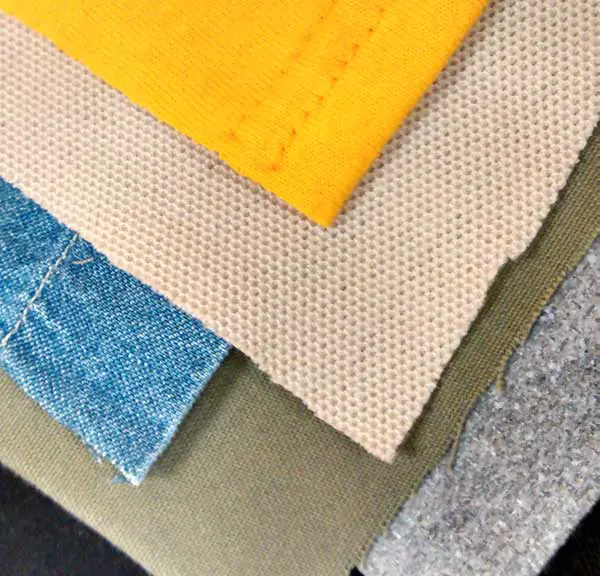
Seeing as I suggest a scientific approach to digitizing, and we’ll be talking about measurement and testing, let’s break briefly to discuss sampling, or ‘stitching out’ one’s designs. Though many digitizers have a sampling run as part of their design process, I’ve seen many test their newly-minted creations on stacks stabilizing material. Though I understand the desire not to ‘waste’ fabric on these tests, this is not the best way to test designs or to learn about distortion in digitizing. Thick stacks of stabilizer don’t react to embroidery like a reasonably stabilized piece of fabric. One should always sample their embroidery on the kind (and preferably color) of material coupled with the amount and type of stabilizer they intend to use for their final project. Remember the scientific angle; we want to replicate the environment where this design will ‘live’. The texture, stretch, nap, grain, thickness, and color of our material all influence how our final piece will stitch and look, so we should test under the same circumstances. It’s fine to use a similar material rather than the real thing (I, for one, use ruined garments and resort to thrift-shop finds to build my sampling library), but the truth is that the highest level of control will only be achieved by those who observe embroidery on different materials and who see each design embroider in its ‘native habitat’. Looking at the image below, you can imagine how differently all of these textures, knits, and weaves respond to the stresses of machine stitching, whereas the non-woven, super stable stack of stabilizer won’t give, stretch, or have the texture that interferes with embroidery. With that out of the way, let’s get back to ‘Push’.
Push Distortion happens when stitches that are laid close together try to push each other (and their base fabrics) apart in order to lay in a single layer. Imagine someone trying to stack round pencils on a flat surface – they would settle and roll off of each other, expanding the stack toward the long sides of the pencils until they lay in a uniform layer one pencil thick. That is what we are talking about here.
In a satin stitch, push distortion will cause the stitches to ‘push’ out toward the ends of the stitch column, meaning that if you create a vertical column of satin stitches in your software, like a sans-serif uppercase ‘i’, and stitch it on your machine, the embroidered ‘i’ will be slightly taller than the one on your screen. Though this varies depending on your combination of base fabric, stabilizer, and the like, this is usually between .13mm and .2mm. I caution that many factors do play into these measurements; the ultimate test for distortion always lies in measuring an properly embroidered sample. In the custom patch below, it’s easy to see how a very even round of lettering looks much less so in the digital file; the ‘I’ and “E’ of ‘UNITED’ handily show how we compensate for push and pull.
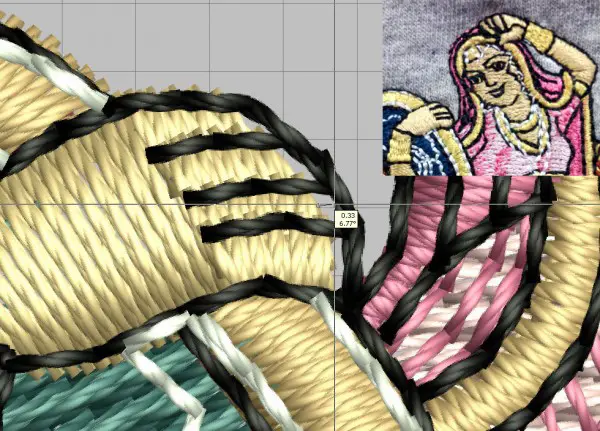
How can we conquer this kind of distortion in digitizing? The simple explanation is that we stop our satin stitches somewhat before the point we’d actually like them to reach in our final stitching. If we want our aforementioned letter ‘I’ to be the same height as a letter ‘E’ beside it, our on-screen design ‘I’ will stop on the top and bottom well before the edge of said ‘E’. As it will ‘push’ out to the top and bottom ends when it stitches, the embroidered result will be that both letters arrive at the same height, just so long as our ‘E’ is also somewhat taller than its final height due to compensation for our previously discussed foe, ‘Pull’. You can see readily in the image below how the woman’s fingers, here rendered in satin stitches, are ‘stopped short’ well before the outline that is to meet them in the final piece.
Push distortion can cause ill effects in your finished pieces, but they are simple to understand and correct, now that you know how ‘push’ works. For example, if you have a straight stitch outline around an filled element and the fill expands beyond the outline toward the ‘long side’ of the stitches, you know it has ‘pushed’ out of register. Measure the distance that the fill has passed the outline and end your fill that same distance before it reaches the outline, even if it leaves a gap on-screen, because you know that the fill will ‘push’ into position when stitched. This goes for any full-coverage stitching, not just satins.
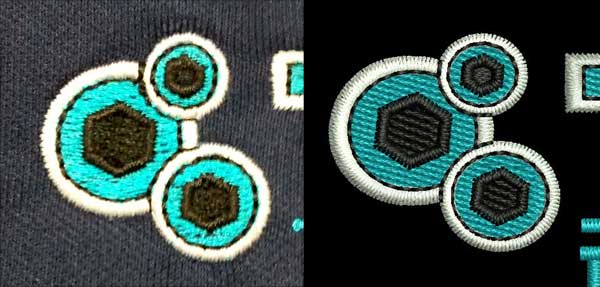
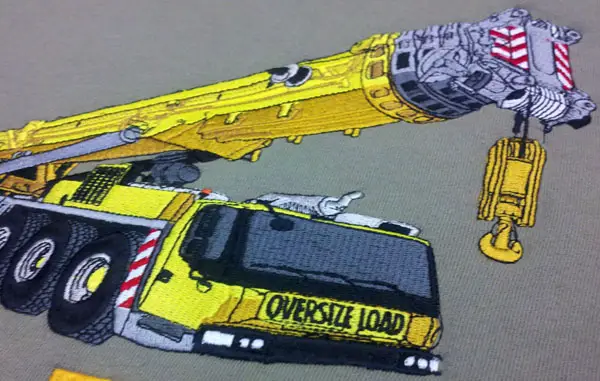
Another frustration many novice digitizers face is also due to the Push/Pull combination; shape distortion. This is most easily seen in filled circles that look perfect on-screen but stitch out of round. Though other factors come into play, Push and Pull most often cause this headache. If we make a perfectly round circle of basic fill stitch in our software, the actual stitches will push in one axis (toward those long sides) while pulling in the other (into the center of the stitch loop), causing the stitched element to be more oval than circle. The trick is the same as in our previous examples. Make the circle wider along the angle of the stitches and shorter in the direction that the stitches ‘push’ – the slight oval you see on-screen will be a circle when embroidered. As seen in the above example on a particularly cantankerous piece of stretchy sportswear, sometimes the distortion is grave enough to require multiple directions and levels of compensation. The below example shows what happens when a design made for a stable material is moved to a stretchy, lofty sweatshirt. From the gap on the front of this crane, it looks like I’ll be reworking some of my compensation.
There are many more reasons for pull and push distortion and ways to mitigate their effects than we can cover in even these two lengthy posts, but in learning about these chief causes we discover essential truths about digitizing and machine embroidery. First, what we see on-screen is never what we see when the stitching is done; therefore, we should always create with the knowledge that the right imperfection in our files can lead to our desired ‘perfect’ result. Second, that machine embroidery is an intricate interaction between stitches and materials that combines art and science, that requires a balance between man and machine. By careful and curious observation, controlled testing and thoughtful analysis, we can learn to control that interaction. The machine can only make one stitch; everything beyond that point-to-point line of thread is born of the interaction between and among stitches and between the stitches and their substrate. If we seek to understand and control those interactions on a small scale, we can control them at any scale, and with practice, this dance of control and compensation becomes an intuitive part of our creative process.
–—
![]() Erich Campbell is an award-winning machine embroidery digitizer and designer and a decorated apparel industry expert, frequently contributing articles and interviews to embroidery industry magazines such as Stitches and Printwear as well as a host of blogs, social media groups, and other industry resources.
Erich Campbell is an award-winning machine embroidery digitizer and designer and a decorated apparel industry expert, frequently contributing articles and interviews to embroidery industry magazines such as Stitches and Printwear as well as a host of blogs, social media groups, and other industry resources.
Erich is an evangelist for the craft, a stitch-obsessed embroidery believer, and firmly holds to constant, lifelong learning and the free exchange of technique and experience through conversations with his fellow stitch-workers.


