")
If you’ve want to try cross stitch but don’t know what to do, I have got all the answers you need. It’s a fantastic craft that can bring you hours of pleasure and it’s changed my life, so I hope this will encourage you to pick up a needle and try.
Here are the topics I’ll cover so you know how to cross stitch:
- Choose The Right Needles
- Get The Right Amount Of Thread
- Separate The Strands
- Feel The Fabric
- Use Hoops & Frames To Free Your Hands
- Get Good Gizmos
- Get The Light Right
- Create Cross Stitches
- Finishing Off
- Use Back Stitch
- Snippets of Wisdom
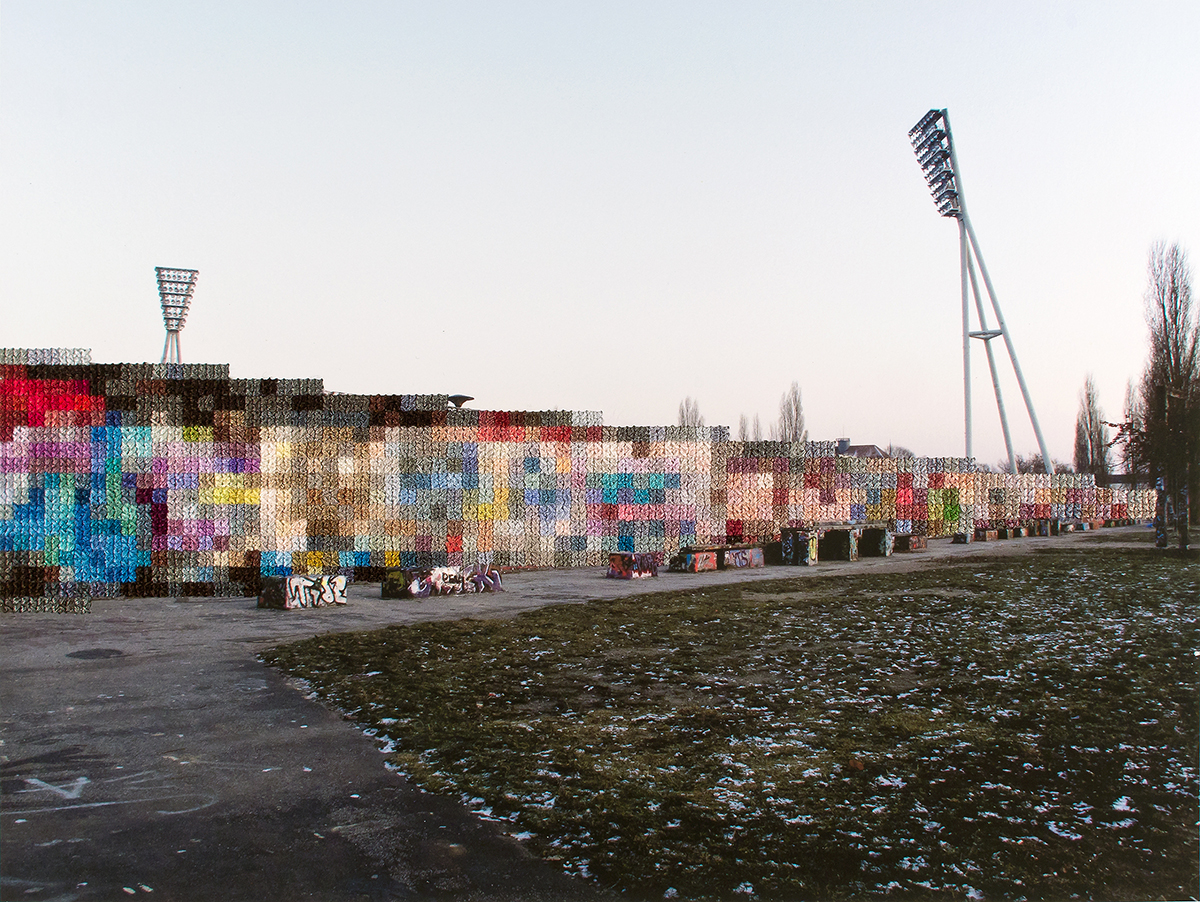
Cross Stitch is the craft I fell in love with and it’s fair to say that it has changed my life. It’s a simple stitch to learn and yet it’s one of the ultimate mindfulness methods, as the slowness and repetition of the stitch is deeply soul-soothing. On the site here we’ve got hundreds of inspirational posts about cross stitch, but this is the definitive guide that will explain everything about this creative craft.
As you can see, there’s a lot to cover, but by the end of it, there will be nothing stopping you from sinking your needle into some fabric and getting your stitch on, good and proper. So if you’re sitting comfortably and you’ve got a tasty beverage, let’s crack on!
Know Your Needles
")
The needle is to the stitcher what the Katana is to the Samurai warrior, and as needlecraft ninjas, it is important that you know your weapons and choose the right ones for your battles. You might think I’m being a bit dramatic, but if any of you have completed a Heaven and Earth design, you know what an epic achievement it is.
Made from steel, needles come in a range of sizes and types, depending on the work you’re doing. Generally speaking, cross stitch is done using Tapestry needles, which have a slightly rounded end with a large eye. The sizes range from 13 & 14, which are ideal for younger stitchers working with binca and other low-count fabrics, up to 22 to 28, that are most commonly used for cross stitch. Generally speaking, with needles, the higher the number the finer the needle.
If you’re looking to embellish your work, or branch out into ribbon work, crewel or other hand embroideries, you may choose to use Embroidery needles, however the sharper ends (ideal for piercing fabrics) are more likely to catch on the irregular surface of aida or evenweave and can often slow you down.
If you’ve a big design and time pressures, you could try the John James Twin Pointed Quick Stitch needle, which has the eye in the middle with two ends. It’s great for people using a frame as you can use a shuttle motion to push the needle up and down without turning it, shaving micro-seconds off each stitch. I’ve used Twin Pointed Needles in the past and you can get a good pace going if you’re using them (and listening to some cracking drum and bass music at the same time).
If you’re feeling fancy, you can use gold-plated needles, whose surface holds the thread and works with the fabric in a subtly different way. It’s really hard to explain, but they’re slightly better. And they are a bit more gangsta, so I like em!
Just remember, needles are sharp and metallic, and they’re not good for swallowing or sticking in flesh so be sure that you know where you put them when you’re done! There’s nothing wrong with a pin cushion in your life.
Tackle Your Threads
")
Embroidery thread, or floss, is the main ingredient in your stitching system. There’s a huge amount of variety in colour and texture, from bamboo floss to silk thread, as well as metallic and glow in the dark versions.
Most threads are made from cotton, and dyed using industrial dipping processes. The two main thread manufacturers, DMC and Anchor, have hundreds of colours for you to choose from, as well as offering variegated varieties if you’re feeling funky.
As with most good things in life, you can find fancy artisanal threads if you look hard enough, and it can be really pleasing to buy hand-dyed silks from a local producer. Companies like Kreinik offer shiny, sparkly and metallic threads for you to add glitz to your work.
Generally speaking, embroidery floss comes in skeins that are over eight yards long, with six strands per skein. In most cases you’ll use two strands of thread for stitching and one for back stitching, although if you’re using dark fabrics, a three ply option will make your stitching thicker and hide the background.
Separating The Strands
")
An important aspect in exploring how to cross stitch is method for separating your strands of thread, and here’s my trusted method for doing it without too much kerfuffle.
Take the floss between your thumb and forefinger and spread the strands apart. Find the one you want and pull it, while holding the other strands between your thumb and forefinger. As long as the strand isn’t too long, it should come out without a hitch.
Try to resist the temptation to pull out more than one strand at once, as it’ll probably get tangled up. These threads have lived close to one another their whole lives, so if you try to pull a pair of them out at the same time, they will struggle to let go of their family.
Most of the time you won’t want to cut your thread to longer than the length of your forearm, as that’s the maximum stitching motion your arm will give you, unless you’re a stretchy superhero. The exception to this rule is if you’re using the Loop Technique to start, but even then, you don’t want too long a thread as it’ll be more hassle than it’s worth.
Feel The Fabric
")
To ensure a consistent cross stitch structure it’s important to have a grid pattern of holes that you can use to stitch through. There are quite a few ways to achieve this and while we’ll look at some of the more unorthodox surfaces later in the book, let’s start with the simple stuff.
While there are numerous surfaces you could stitch on, generally we go for fabric as the medium of choice and with cross stitch there are some very specific fabrics ideal for our purposes.
Cross stitch fabric can be broadly classified as Even Weave, as there’s a consistent number of threads per inch in both width and length (or warp and weft to use the correct terms), also known as thread count. However not all even weaves are Even Weave, and you can also use Aida, Linen or Needlepoint Canvas.
More often than not, evenweave and linen fabrics use a 1:1 thread ratio, so the holes you stitch would feature at the intersection of each thread. If you want to stitch on linen, you’d probably need to use a single strand of thread and some magnification, as that 1:1 ratio could potentially equate to 32 stitches per inch!
Aida is the most common cross stitch fabric. It was developed in 1907 by Zweigart with the four warp and weft threads being woven to produce an openwork effect. Aida is available in a range of thread counts (stitches per inch) from 6 to 20, and there is a myriad of colours available.
Thanks to innovations in digital printing, it’s now possible to get your aida pre-printed with all manner of designs, and I’d like to give a shout out to my chums at sewitall.com who have a glow in the dark aida in their arsenal.
TOP TIP: When using black fabric, have something light behind it – a piece of paper will do – so that you can see the holes that bit better. It’ll help keep eye strain to a minimum.
Waste Canvas is a useful material as it allows you to stitch cross stitch onto non-even weave fabrics by providing the grid you need for consistent stitches. Waste canvas can be placed onto any fabric, and once you’ve stitched your design onto it you can pull out the threads of the canvas, leaving the stitching directly on the fabric.
As well as waste canvas you can also get paper interface that provides the grid for stitching and can be removed after you’ve finished.
Soluble plastic interface is the other alternative, which dissolves in warm water when you’re finished, but can leave a residue on the stitches, making them a bit stiff. If you’re going to use the plastic, be sure to rinse it out well!
Hoops & Frames
")
Fabric is floppy and while there’s nothing wrong with cross stitching au naturel, the addition of a hoop or frame can make your stitching experience so much better by holding hold your fabric tight, providing a stable surface to work with. There’s a wide range of hoops and frames available, depending on your commitment to your art.
The most familiar hoop is round, made of wood, comes in two parts with the outer section having a screw for tightening. Plastic versions are readily available, but my personal preference is wood, as they’re more pleasant to the touch.
You can get hoops in many different sizes although a six or eight-inch hoop will serve you well as a starter. Over on Etsy, Dandelyne is changing the world with her tiny one and two inch wooden hoops, which are super cute and perfect for framing micro embroideries, and at the other end of the scale, you can wrangle 12 inch hoops to house big fabric artworks if the mood takes you.
You see, that’s one of the nice things about wooden hoops – they double up as stylish frames for work, and look perfect on the wall of your home, adding that Scandinavian vibe to your décor. A simple search for Hoop Art on Pinterest or Instagram will reveal how good your work could look in a hoop and there’s nothing wrong with sanding and painting your hoop before framing a piece.
TOP TIP: When working with a hoop, remove the fabric from it when you’ve finished your stitching session. Not only can the hoop leave marks on the fabric over time, but you might end up with some deep-rooted creases in the work that might be tricky to get out. While it’s a bit of a pain taking your stitching out of the hoop each time, trust me, it’s easier than dampening and ironing your work umpteen times to get the stretch marks out!
Frames are slightly different to hoops, as they tend to be suited for bigger designs that you’ll be working on for some time. Scroll frames are typically made of wood, with top and bottom batons that you can attach your fabric to, and sides that the batons clip into. Because you can rotate the batons in the sides, you can roll your work up and down the frame as you need to, while maintaining the tension in the fabric that you’re seeking.
There are plastic variations of frames, with Q-Snap frames being a popular choice as their clip-on method is less fiddly than the scroll frame. If you’re really getting deep into stitching, then a seat frame or floor standing frame is a worthwhile investment, as you can attach frames and hoops to it, freeing up both hands for stitching (or stitching and cocktail making if you’re a show-off!). Having both hands free to stitch is a great time saver, and if you love sitting at home stitching, they’re definitely something to consider.
Gizmos
")
While you learn how to cross stitch, you also have to learn how to look cool doing it. I love a good gizmo and although I have managed to restrain myself from buying all the new tools that come out, I thought I’d share a few that I think you’ll like.
Bobbin Boxes – If you’ve got more than a dozen threads on the go, it’s worth investing in a bobbin box and some bobbins to keep everything in check. While it’s a bit time consuming winding your skeins up, the use of a Bobbin Winder will speed up the process, and it is extremely satisfying to end up with a box of well organised threads. I recommend using plastic bobbins as they will remain firm friends in the long run, whereas their paper compatriots are far more prone to wear and tear. The only challenge then is how you organise them – by colour or by number?
Scissors – You’re gonna need some blades if you want to cut your threads and there is a myriad of scissors that you can choose. However, when indulging in needlework it’s useful to have a fine pointed blade for getting underneath stitches that need removing, and it’s quite nice to have a magnetic tip that’ll pick up needles and pins. If you can, try to keep your scissors just for needlework and let other pairs around the house deal with the other cutting chores.
If you really want to treat yourself, check out the scissor section at Beyond Measure, where Grace has chosen some truly tempting tools!
Laying Tools – For a nice finish to your work you’ll want your stitches to lay nice and flat, and the best way to get this effect is by using a laying tool. Railroading is a technique wherein your stitches lay parallel to each other, much like train tracks, and a laying tool helps achieve this by stabilising your stitches as you pull them. You can use a needle to the same end, but if you’re taking this stuff seriously, a metal or wooden laying tool is a must. (They’re also quite handy for scratching your ears!)
Needle Minders – Take a couple of strong magnets, put a nice surface on the top of one of them and you’ve got a needle minder! These are handy as the magnets mean you can stick them to your fabric and keep your needles in one place while stitching. They’re a handy alternative to…
Pin Cushions – If you’ve got children or pets, you might not want to take them to the doctors or vets to have needles removed from them. So get a pin cushion. You can buy them in all kinds of colours and sizes and a tiny bit of money spent on a cushion may save you a buck or two in the future.
Threadcutterz – When you’re travelling you might want to take a thread cutter, rather than some scissors, to avoid any confusion about safety. While there are quite a few types of cutter, I really like the Threadcutterz ring, which sits on your finger and contains two blades that’ll cut through most threads with ease.
Thread Conditioner – If you’re using shiny threads or metallic threads, you might find that they don’t always behave themselves, either coming loose or getting stuck on the fabric. Thread conditioner protects your threads with a fine layer of PH neutral coating, making shiny threads a bit more adhesive and making metallic threads a bit smoother. It’s a really useful thing to have if you’re getting bling with your thing!
")
Let There Be Light
When you’re young and invulnerable you’ll probably be able to cross stitch in the middle of a nightclub, with the bassline rhythms helping your needle make its way across the fabric, but as you get older, it becomes important to think about light.
You will save yourself a lot of time and potential headaches if you stitch in well-lit conditions. Daylight is the best, with a good indoor spotlight coming a close second for those people who keep their stitching at home. I’ve experimented with a few ideas over time and here’s a whistle stop summary of what I’ve learned:
If you’re stitching with a frame there are various clip-on lights that you can try. Key things to look out for are flexibility (the ability to position the light in the direction you need it), portability (how cumbersome it is on and off the frame) and power. With the latter, battery operated models offer mobility, whereas a plug-in light keeps you near a plug socket, but the batteries won’t run out.
If you don’t use a frame, it’s good to get near a lamp at the very least. If you can get away with it, using a daylight light bulb will help you see the colour differences. If you use a clip-on battery lamp, then think about getting rechargeable batteries to go with it. You don’t notice when the batteries start to fade but you’ll be stitching in the dark again if you’re not careful.
If you have the budget, it’s worth investing in a dedicated stitching lamp and, again, daylight lights will be your best purchase. I use the Daylight Company’s Slimline LED lamp, which has a long flexible arm while also having a discreet design that doesn’t look odd in my living room. For the maverick among you, a head torch is a handy way of getting light when you need it. Just remember to take it off before you go out for the day!
How To Cross Stitch For Beginners
")
You’ve done well to make it this far, thank you. So now we’ve covered the tools, this is where it gets real!
Cross stitch goes like this: each stitch is made of two stitches, a bottom stitch and a top stitch, and I always talk about forward slashes and back slashes – //// and \\\\.
Now there’s only one rule about cross stitch – there’s only one rule about cross stitch – try to make sure your bottom stitch goes in the same direction. So you might do forward slashes for the bottom and back slashes for the top, or vice versa. As long as you stick with this principle, your cross stitch will look nice and even in terms of texture.
(Psst – even this rule can be broken, and there’s nothing wrong with it. If you’re a brain surgeon or airline pilot, please adhere to the rules you’re given, but if you’re a cross stitcher, well, no one is gonna die if you stitch it however you want.)
When it comes to following cross stitch patterns, essentially it’s like painting by numbers, as you should have a design with a colour code attached, and you count the number of stitches of each colour as you stitch. If it’s a design that will take a long time, it’s often wisest to stitch the colours from dark to light, so that any dirt you pick up along the way is less likely to show up.
When starting a design, you want to pick a section of colour that’s close to the centre and stitch it, moving to similarly coloured sections as you go. I’ll talk about this principle in more detail later on, but find yourself the bit you want to stitch and get ready.
So let’s crack on. You will need:
- Fabric
- Threads
- Needle
- Hoop (optional, but recommended)
- Some water (optional, but it’s good to be hydrated)
- Whatever else you need to be comfortable – I recommend some groovy music with a mellow vibe to help keep that easy feeling.
")
Now that you’re set, let’s get a-stitching!
First off, we’ll get the fabric in your hoop. It’s good practice to fold the fabric in half both ways, and put a little crease in the centre, as this will help you identify the middle of the pattern. Most large patterns will show you where the centre is, and believe me, it’s super annoying to run out of room on your fabric, so it’s important to start in the middle and work outwards. All being well, if you’ve got the right size, the design will fit on the fabric as you like it.
With the fabric in place, next up it’s the thread. In the Thread section I explained that you won’t really need a piece longer than your forearm, and I showed how to separate your floss strands, so scroll back up the post and then come back to me.
You back? Right then.
The first cross stitch for beginners technique we’ll use to get stitching is the Loop Technique. For this you’ll want to take a single strand of thread, fold it in half and put both ends through the needle by at least two inches.
You should know where you want to start stitching, so start by poking the needle from underneath through your desired hole, and then do your first forward slash by moving diagonally up and to the right to the next available hole. Pull the thread through, but not all the way, and with the first stitch only, put the needle through the loop on the back. This will hold the thread in place in a super tidy way. Clever huh?
")
When I’m stitching, I tend to have the tip of the needle near the tip of my forefinger, as it’s easier to find the hole I need when rooting around on the backside. I usually press the eye of the needle against my middle finger, as it holds the thread in place and reduces the chance of it slipping out.
")
To complete the stitch, simply do a back slash from the top left hole of your “square” to the bottom right, and hey presto, you’ve got an X.
You’ll always have two holes that you can enter when making a stitch, going from top to bottom or bottom to top, and on the whole it doesn’t matter which way you go. There may be a natural direction that you’re stitching in, depending on your design, so your stitches might follow that. You might find that you’ve already used one hole with a previous stitch, in which case you’ll have to use the other one. The best thing to do is not overthink it and you’ll work it out.
Don’t worry if your bottom stitch is a forward slash, or a back slash, just do whichever one comes naturally, and then continue with that as your bottom stitch throughout.
If you need a rerun of this explanation, check out this helpful (and quite funky!) YouTube tutorial!
TOP TIP: If I’m following a pattern, I will often complete a particular section using bottom stitches only, as it’s the bit that involves counting and concentration. Once I’ve completed the section, I can go back on myself with the top stitches, without having to count, and therefore having a less stressful existence.
The other common method of starting is called the Waste Knot Technique. This is useful if you don’t have a long thread and therefore a loop to use – if you’re using the same bit of thread in a different section for instance. Complete mastery of cross stitch for beginners involves knowing both of these techniques, so let’s crack on!
With the Waste Knot Technique, you’ll want two strands of threads, no longer than your forearm, and you’ll tie a knot in the end. This can be done by wrapping the thread around the end of your finger, rolling the thread off and then pulling the end. All being well, the thread should form a knot big enough to stop the end of the thread from getting through the holes in the fabric.
You have to work out what direction you’ll be stitching in – right to left, up to down, whatever – and then you’ll place your knot away from the section you’re stitching, but in the direction that you’ll be stitching. Bear with me on this…
")
You plunge your needle through the fabric from the top side, and the knot will hold the thread in place. You’ll then move to the place where your first stitch will be and come up from beneath to do your bottom stitch. You’ll notice that the thread has been held along the underside of the fabric, and as you start stitching, in the direction of the knot, your stitches will start securing that thread in place (technical term – couching). Once you’ve stitched a few stitches, you should be able to pull your knot gently upwards and snip it off, with the thread held in place by your new stitches.
")
It might seem like a complicated element of cross stitch for beginners, but if you can get used to it, you’ll be in great shape! Just remember that you want to stitch in the direction of the knot, so your initial knot placement is important.
Again, if that don’t make no sense, then we’ve got a YouTube video for you!
So you’ve got to grips with the basic X of the cross stitch and, between you and me, there ain’t a heck of a lot more to learn. It is ridiculously simple.
The main things to remember are to make sure you put the needle through the holes, rather than piercing the fabric, and that you don’t pull your stitches too tight as it can cause unnecessary tension.
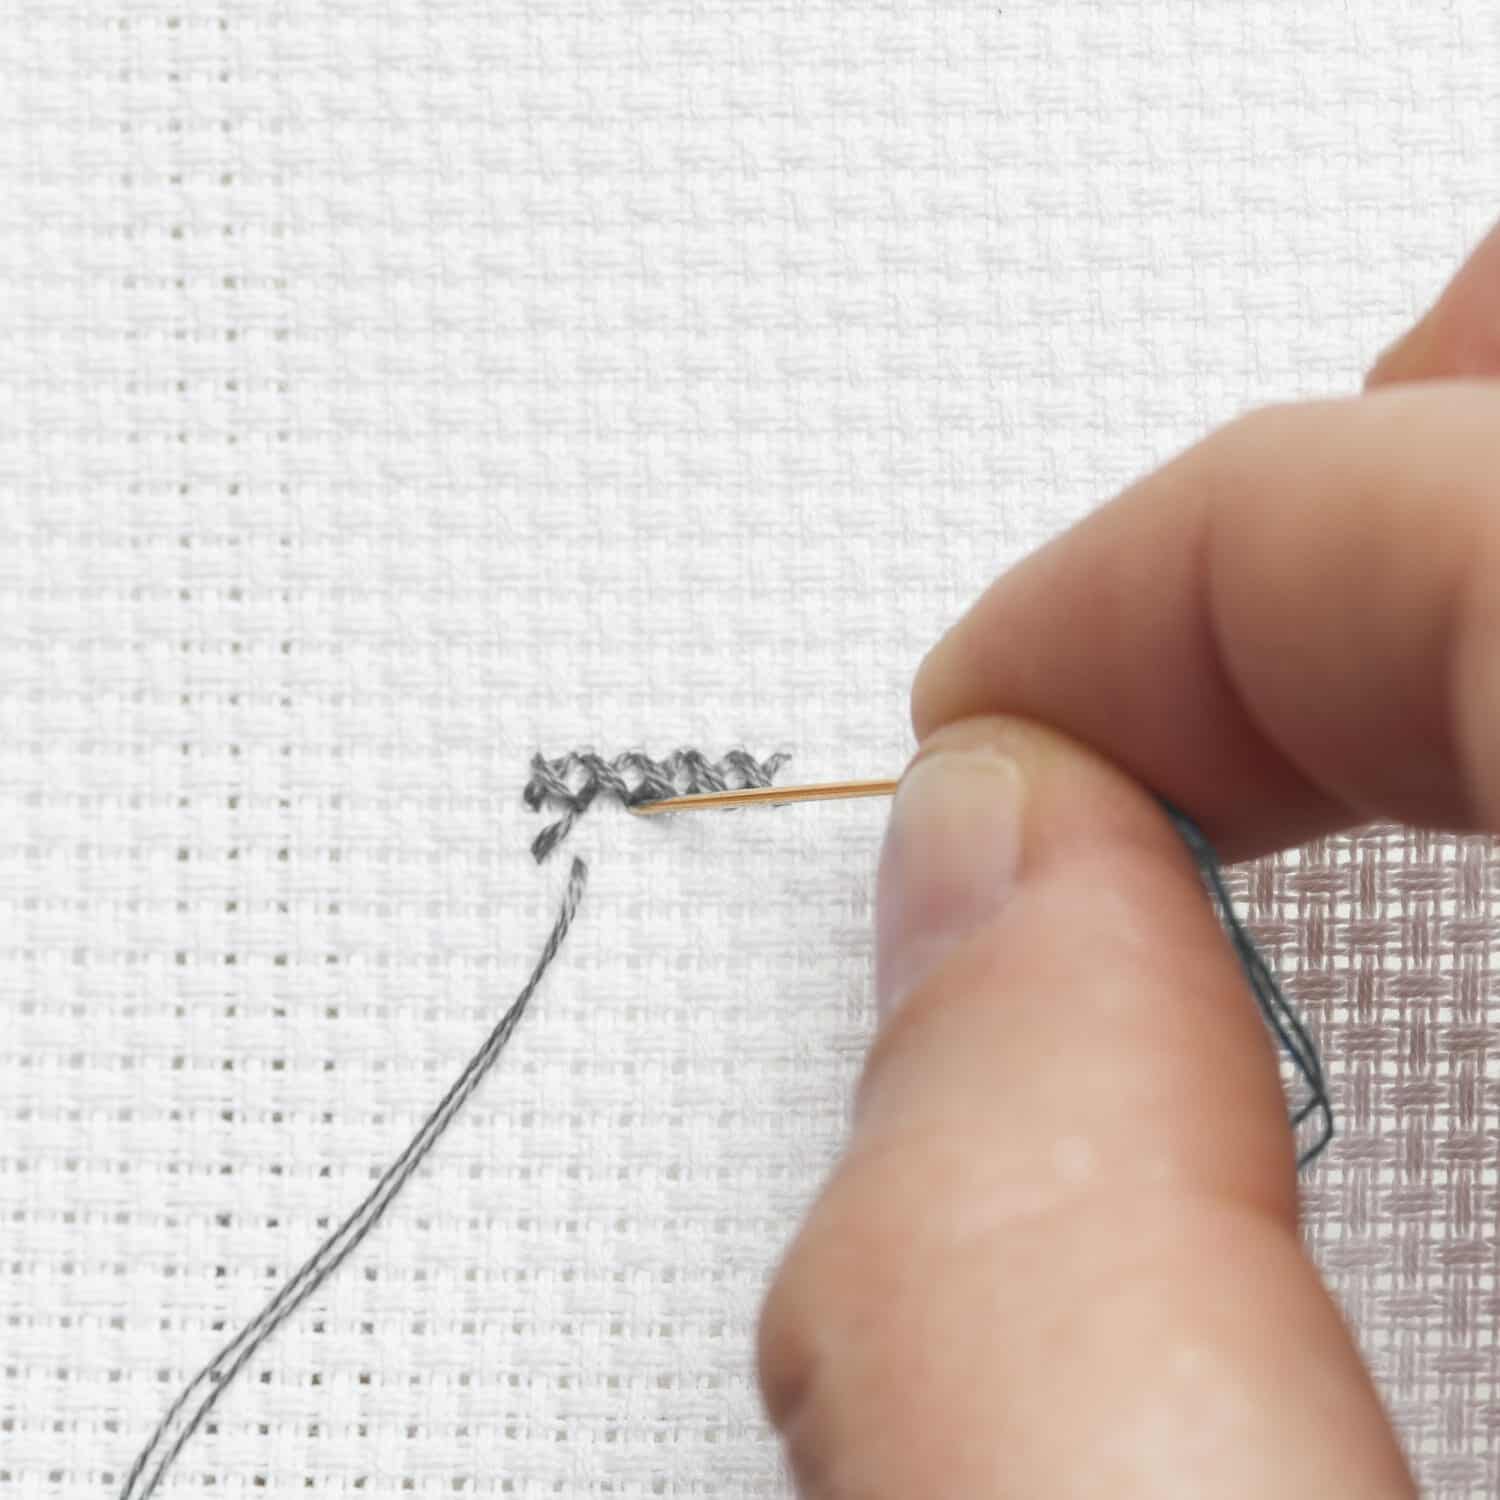
Finishing Off
The Circle of Life means that all things must come to an end, and the same is true for cross stitch. At some point, you’ll either run out of thread, or come to the end of the section you’re stitching, and therefore you’ll want to secure your stitches.
To finish cross stitch, all you need to remember is Wheedle The Needle.
Basically you take your needle and wheedle it under three or four stitches on the underside of the piece, pulling the thread through and snipping off the excess. You should find that the thread will be held by the stitches and is nicely tucked away. Simple huh!
")
(A point of note – I’m in the process of trademarking the phrase “Wheedle The Needle” so if you use the words Wheedle, The or Needle, you might owe me 50p.)
Big Up The Back Stitch
Back stitching is used throughout embroidery and is the simple application of a straight stitch to a piece of work. It can be highly effective in cross stitch as it allows detail to be added to the pixelated image, crisping up designs and adding character.
There’s nothing nicer than finishing all the cross stitches and then busting out the back stitch to tidy up a piece and as you will see later on in the book, I like to use it to add a 3D effect to words and images. Back stitching is your friend and you should learn to love it.
Back stitching is fairly straight-forward (or backward, if we’re nit picking) and there’s only one point of note when making straight lines in back stitch. Try to ensure that your thread runs from the top of one stitch to the bottom of the next. That is, each hole will have two threads entering it, and if they are stitched without due diligence, sometimes the stitch will sit above and below its neighbours which creates a less smooth finish when seen from a distance.
")
You might need to trust me on this one, but if you’re able to take the time to place your back stitches as shown in the top row of the image, you will gain the respect of the most nit-picky needleworkers around!
Snippets of Wisdom
So there you have it. I’ve explained how to start, how to stop, and what to do in the middle. As long as you take your time and count carefully you should be okay. But to make this post more than just cross stitch for beginners, here are a few snippets of wisdom to help you level up nice and quickly!
- Because you’re using a continuous thread when you’re stitching, it makes sense to think about the journey you’ll take when stitching different sections of the same colour. You don’t want to make big jumps between spaces if you can help it, as it’s really easy to miscount and stitch things in the wrong place. If you’ve two sections of the same colour near one another, work out the shortest jump between the two and direct the path of your stitching so that you end up at that point.
- Sometimes you can stitch a section with bottom stitches, and then double back, but at other times, the design might necessitate doing both bottom and top stitches as you go. This will become clear as you get stitching, as there will naturally be some elements that you won’t want to double back on. Conversely you might find that there’s some elements that you have to stitch and then double back on, to avoid stitching yourself into a corner, as it were.
- If you’ve got a big piece to stitch, you might consider using a single strand of a bright colour to mark every ten rows and columns with a simple running stitch. It might take a bit of time at the start but it could save hours of unpicking!
- You might also want to protect the edges of your fabric from fraying, either by using a running stitch at to add some strength or, if the fabric edges won’t be on show, some decorators tape folded over the edges will do the job. Take care when using tape, as you want something low-tack that won’t prove problematic when you come to remove it.
- Sometimes a pattern will have a lot of different colours for you to play with, and there are some hefty designs in the latter pages of this book. Often times you’ll be stitching a few squares of one colour, a few of another and you won’t necessarily want to be finishing those threads off, so you need to learn about parking.
Parking your threads is a way of positioning the remaining thread approximately where you’ll need it in the future, so that it doesn’t get caught up in the current bit of stitching you’re doing. It’s one of those things that’s really complicated to explain, but not difficult to do. When you’re stitching a section, and you’ve got threads to park, you don’t want them to be too close to the section you’re working on; once you’ve stitched the particular colour, look to see where you’ll be using it next and then place a bottom stitch of the thread roughly in that area. That will keep the thread that’s on the back out of the way and minimise the risk of it getting caught up.
If you’re working on highly detailed designs you’ll want to get to grips with parking as it’s most helpful, and this YouTube tutorial by Peacock & Fig is the perfect explanation. - With big pieces that you know will take time, it’s often a good idea to start with the dark colours and work towards the lighter ones. You’re bound to get some dirt on the piece at some point, even if it’s just dust or grease, and at the dark colours can hide these misdemeanours better than the light ones. If you’re working on a large design that is predominantly one colour range – blues and greens, for example – there’s no harm in having a design with an alternative colour palette – reds and yellows – so that you can switch between them to avoid colour-based boredom.
")
And there you have it, dear reader! Congratulations on making it to the end of the post – you now have all the knowledge you need to dominate the world of cross stitch!
Thanks for taking the time to read this. If you liked it or if you have any more questions, feel free to leave a comment below, and please share it with friends and loved ones! By clicking on the links in this article, you’re helping us keep the lights on, so thanks for that as well!
Happy stitching!
Looking for modern cross stitch patterns? XStitch Magazine is a quarterly digital magazine featuring themed patterns from an international cast of designers. Subscribe for only £6 a quarter!
")