
Welcome to A Stitchalicious In Time where we share tips to help you elevate your stitching skills!
As any good boy scout will tell you, we have to be prepared. Which means having the right embroidery tools for the right job and today I’d like to look at some of the best ways to gear yourself up for your next stitching project. I’ll cover:
- Needles
- Cutting Tools
- Hoops
I’m not, however, going to mention thread or fabric because there’s so much variety and personal choice involved in those, except to say: avoid cheap stuff. Those 10 cent skeins from a no-name brand sounded like a great deal, but stitching with them will just make you sad.
Pointy Things
As embroiderers, our number one weapon is the needle – and not those crude, ungainly things knitters call needles, but the slim, elegant and kinda sexy metal kind. But there’s a wide variety available and just which one should we use? Surely, our woollen tapestry is in need of a slightly different needle to, say, a homemade tattoo. Now, just like with threads, I have a tendency to collect needles, so here goes with a quick and dirty introduction.

Tapestry needles are my go-to needle for all things cross stitch. The blunt needles don’t pierce the Aida in funny ways or split your floss. You always slide easily into the hole (er-herm) and because you haven’t split other stitches, you can unpick quickly if you make a wrong stitch (not that I ever have to do that. Nuh-uh). They have an elongated eye which is pretty easy to thread, even on moving public transport. For size, I am partial to a 26 or 28 (the higher the number the smaller the needle) – going as large as a 22 or 24 I find tends to stretch the holes bit, but that does depend on the fabric size you use.
For a good look at some nifty needles, check out Jo Burgess’ review of Pony Black Needles here!

Sharps are, clearly, sharp. You’ll use these for all manner of surface work embroidery. If you’re a split stitch aficionado this will be your chosen pointy thing and they’re perfect for piercing closely woven fabrics where you don’t want to hit a specific hole. The eyes tend to be significantly smaller, built mainly for have sewing thread threaded through, so bring patience or one of those cheater threaders!
Chenille needles are pretty big. When you’ve gotten used to size 28 Tapestry needles you feel like you’re suddenly wielding a machete. They’re large bored, sharp and have a wide, elongated eye. Perfect for dealing with wool and what you’ll want with thicker threads.
Straws (also called Milliners) are quite long needles with a fairly small eye considering their size, but more importantly, the needle doesn’t widen around the eye. This makes it a beautiful piece of metal for creating bullion knots on and, I find, even makes the simple little French knots just a tad easier. Really, if you find that bullion knots have never really worked for you, give these a shot.
Whatever you use, avoid the really cheap needles you can pick up at, for example, markets in Ho Chi Minh City. They can be weirdly uneven and catch your fabric, break easily and rust or discolour quickly. Just saying.

Bladed Things
Stitchers tend towards itty-bitty scissors and I’m no exception, although I do find that getting my fingers in the itty-bitty handles is sometimes annoying. My mother has a small pair of what look like sheep shears and if I ever find them, I’m buying up the entire stock because those things are AWESOME. Most important for us is that the scissors have very sharp pointy points, so that we can easily slip them under incorrect stitches and exactly snip them out (again, one of those things that can happen in theory). Using nail scissors works, but having blunt tips, different length points or dull blades will also just make you sad.
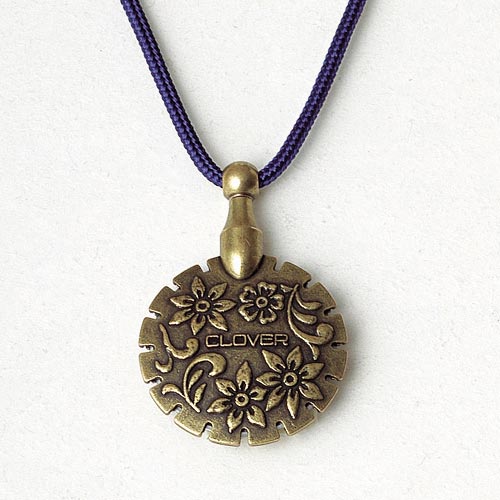
Another thing to occasionally consider is the travel restrictions: clearly a 2 cm blade is cause for an international incident. In those circumstances there are the Clover cutter pendant or, the budget option, the top of a dental floss box. While those are great for tidying up the back when you’re traveling, they aren’t great for cleanly cutting six stranded floss, so I usually pre-cut the floss on my travel projects.

Stretchy Things
Now as part of the getting things all neat and even on a flexible surface, we’ve got a few ways of stretching out fabric to stitch on. Most common are hoops (which have also started doubling as a framing solution). The traditional wood hoops are still the favourite, although if you’re going to use them have a think about binding the inner hoop. This will hold the fabric more securely, thereby keeping it drum tight. Mary Corbet on Needle’n’Thread has a great tutorial for doing this. The plastic hoops with spring inserts are among my faves for travel pieces as they’re so quick and easy to set up. The number one rule of using hoops is: don’t leave your pieces in them or you’ll have a really hard time removing the hoop marks afterwards.

Frames are the other option and tend to be what I use for larger and more time consuming pieces. There are a few varieties: scroll stretcher bars are the most common, where you sew your fabric on each end to a scroll bar and then roll it around, using the stretcher bars for tension. Slate frames are for the very serious embroiderer, and let you get good tension all the way around a piece as the sides are also tensioned across to the spacer as well.
Another option is something like the Q-snap, which looks a little like plumbing. I bought one and have never tried it out, so I can’t give you feedback on that, I’m afraid. What I personally use are normal scroll bars which I then tighten to the sides by pinning bias strip to it and then wrapping that around the stretcher bars. Okay, that’s non-obvious to explain so here’s a picture:

If you want to use frames, make sure you get a stand. The one I have is cheap, but wobbly and that can be a bit annoying. Again, the theme of the day is spending a bit of money on things you will be using a lot. If you’re going to spend hours using tools, save up the pennies to get yourself some quality – you won’t regret it!
—–

Jacinta Lodge is the embroiderer behind Stitchalicious, and purveyor of graffiti cross stitch patterns via StitchaliciousDesign. Her embroidered artworks have been shown in exhibitions in Germany, the UK and Canada and published in The Anticraft and Indie Craft. Jacinta is Australian, but lives in Berlin, Germany, where she does roller derby and listens to her husband hark on and on about VW buses.