Welcome to Beneath The Folds, where Christine Cunningham explores the creativity of textile art, from inspiration to technique.
A new textile creation is very exciting. You will have your idea – often part of a theme – done your research, gathered fabrics in your chosen colour palette and have selected embellishments to add texture and detail.
The preparation in advance can make the project less overwhelming by breaking it down into stages. Let us look at simplifying the process of creating a new textile by exploring:
- Colour
- Size
- Using A Framework
- Depth
- The Finishing Process
- Hanging A Textile
- Themed Works
- Visibility
- Photography
- Creating Prints
- Having A Workable Timetable
Colour
Colour, or lack of, will determine the emotional effect upon the viewer. Striking colour combinations can be a real statement, exciting, vibrant, uplifting.

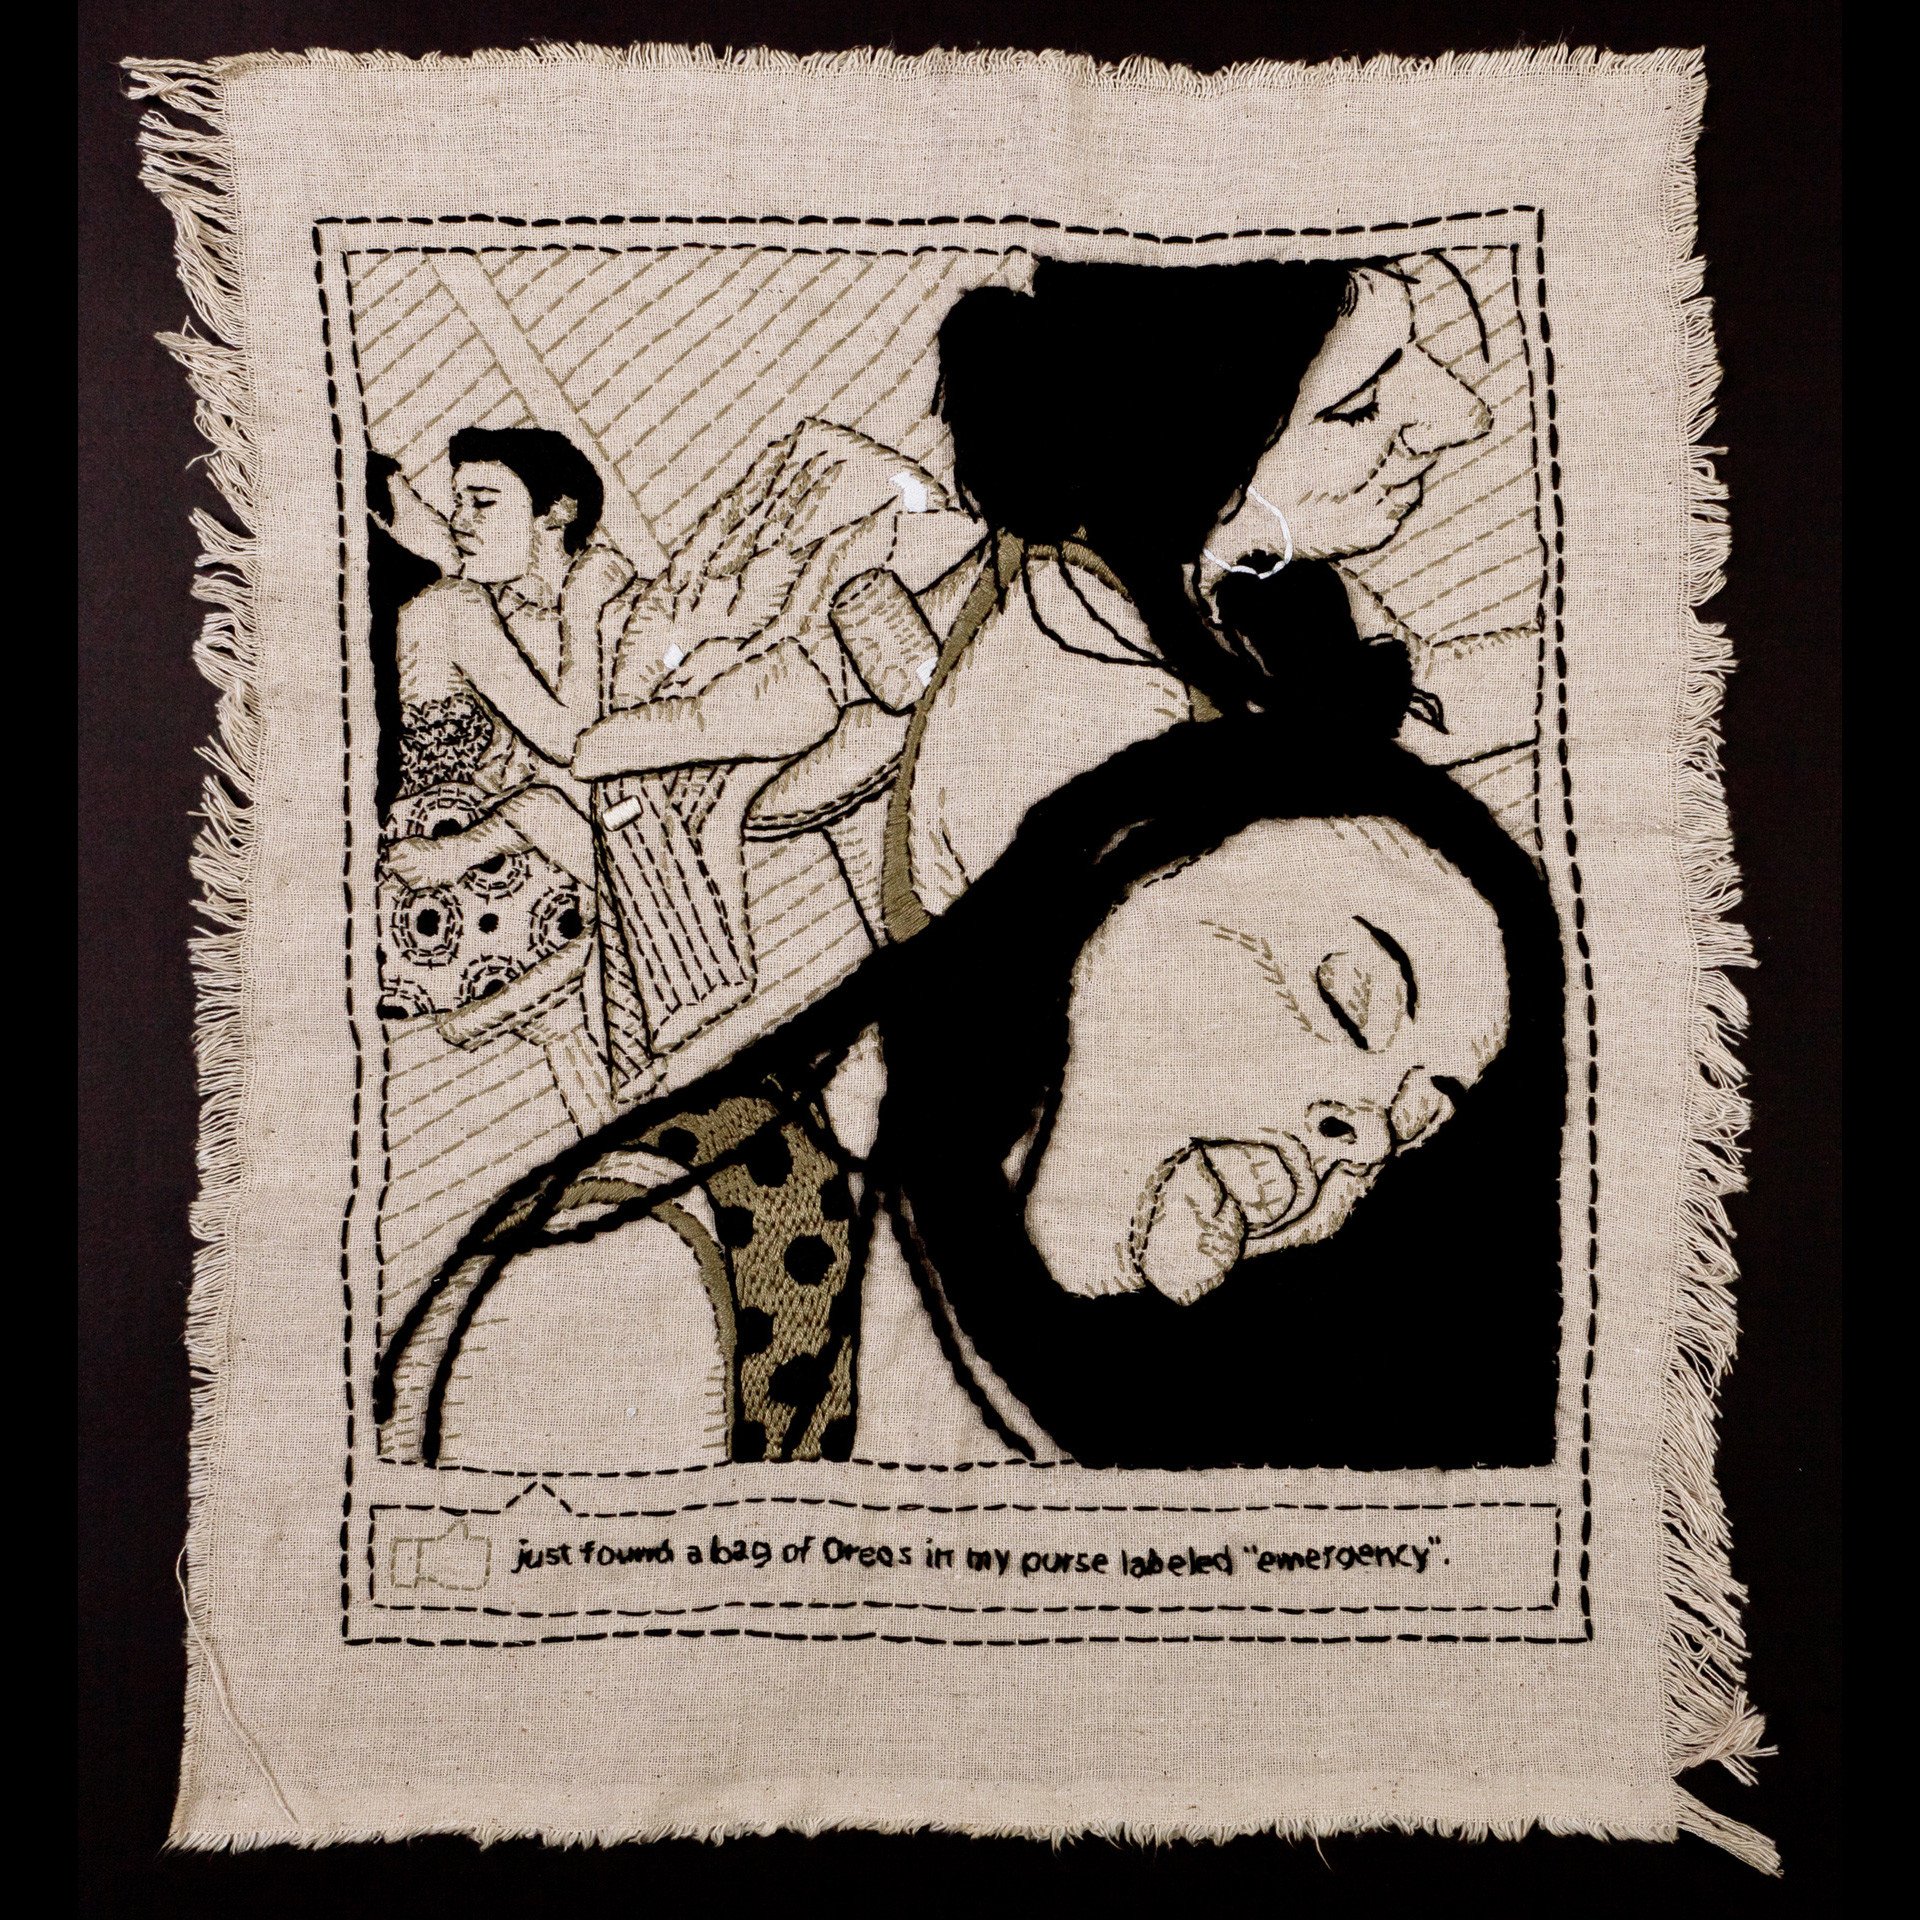
Muted tones can create a delicate effect of understated elegance. The subject matter in Fur Pocket is highly controversial but is deliberately set against a mix of ivory, cream, mushroom and silver for an unemotional backdrop.

Your subject choice may determine the colour palette you use. The Natural Collection is governed by seasonal variations but you can be creative within that realm of colour.

If you only use recycled materials, as I do, that will dictate what is available to you. I regularly hunt for treasures in charity shops, car boot sales, freecycle, upcycling my own items and gladly receive donations from family and friends to create an abundant stash of colour and tone. The more variation you have the greater the depth you can achieve within a chosen colour palette.
Size
If you simply buy a new piece of fabric you are free to choose the size you desire for your creation. Recycling involves cutting up fabrics and this determines the sizes available.
Soft furnishings (curtains, bedding, blankets, cushions, furniture) provide large pieces which can be used as backing and background on which to work.

Cutting up clothes offers much smaller sized panels of various shape. Flowing summer dresses and skirts can offer quite a volume when cut along seams and removing waistbands. Tailored suits have a more restricted system of panelling, offering much smaller pieces unless you want to keep seamed sections as part of your design.
Patchwork is a favourite technique of mine, creating a rich palette of colour, texture and print from small panels.

Using A Framework
You can grow your textile freely or use a framework as a starting point for your main design to impose size and structure.
Traditional wooden frames, box lids and boards are an effective tool. Measuring a finished piece to square up is always better with a solid structure than doing it simply by eye.

Repetition of size can be used in producing a series of works. Layering sizes can be used in block colour work. Size has impact, whether large or small. I created a series of abstract flower designs using a wooden frame.

Depth
Decide whether you want to create depth within your textile. Layering fabrics within a flat surface is effective. I enjoy exploring volume within my work, using quilting and stuffing techniques to create sculptural effect.
A king sized 4.5 tog (summer) quilt is a cost-effective solution to buying wadding on a roll. The higher the tog the denser the wadding inside. Keep any surplus as a source of stuffing.
The cavity in Cancer 2 was established through layers of fabric, wadding and bubble wrap.

The Finishing Process
Finishing a piece can be just as intensive as the actual textile you have created. Make the side panels and backing fabrics an extension of your creation. A small panel of colour or pattern will have an impact.
Check out my Hanging Sleeve article for ideas on for adding colour to enhance your textile.

Hanging A Textile
The size and weight of your creation will determine how it is to be displayed. I use hanging sleeves as a simple method in displaying against a wall. It is necessary to drill and plug the wall for heavy and quilted works.
Delicate textiles can be displayed with a bamboo cane. Tree branches could be an organic substitute. For very light creations hang from the ceiling with a simple hook (screwed into the beam) using fishing wire.
Transparent works would look good displayed against a window with light changing throughout the day.

Themed Works
I offer a range of themes within my Natural Collection and Womanhood Collection. .
A diverse subject range offers an unrestricted colour palette, expanding your customer base and allows you a wider range of expression as an artist. I work according to what I have available to me.
Moving between projects keeps ideas fresh and works will evolve over time, like the wool and fabric pompoms in ‘Womb’. I avoid buying online. I enjoy giving new life to an old life, working a sense of history, love and family into the foundation of my work.

Visibility
As an artist you want to consider how your work will be viewed and sold. Having your own website with detailed photographs and information about yourself and your work ethic makes you accessible and there are many free sites to choose from including Wix and WordPress.
Where possible, get your own domain and then use social media to get more reach – but don’t rely on the social media platforms in the first instance, as you want to remain the owner of your work.
Explaining your techniques allows the viewer insight into what is involved in a very labour intensive production.
Listing your work with known sites will tap into their established customer base and linking back to your own allows you to build your own customer base for newsletters with interested clients.
Writing for you in this column has enabled me to critique my work, giving insight into what I do as an artist, inspiring me to explore and push the boundaries of traditional techniques and established craft practices.

Photography
Recording your work as you develop it is good practice, promoting insight into your artistry, developing techniques as you hone your skills. Mobile phones enable good images but I like to use a camera so I can create intimate detail by eye in order to develop prints.
Photographing works outside against my house provides a standard brick as a size ratio. Weather and natural lighting establish a seasonal timetable with a routine of creating and finishing works over Summer and Winter months to have ready for Spring and Autumn.

Creating Prints
Creating detailed prints can be an extension of the textile itself, producing collectable prints and postcards. You may wish to extend further into printed goods.
There are many online sites where you just need to upload your image. Check what pixel size is required. The higher the pixel the larger the image with greater definition. Smaller pixel images load faster so you will have to do your research.
Here is an example from The Natural Collection. I used Photoshop to play around with colour ratios but there are many free sites available.


A Workable Timetable
Having textiles available to work on at various stages keeps creativity flowing, allows you to plan your working week, oversee your collections, start new projects when you have gathered enough materials, finish textiles and have them ready for photographing as the weather allows.
Having an overview enables you to indulge when creative juices are flowing, regulate simple processes, allowing you to be engaged in and enjoy each stage of the development. Free time and weekends can be fun expeditions to hunt down new treasures.
Being an artist is indulgent. We rely upon ourselves to create our own working week. If we can be flexible in covering each of the necessary stages we can enjoy what we do without being stressed and it encourages creative thinking.
Check out my post on Creating A Working Environment for tips on being self-sufficient and productive. Honing your working practice can take years as you settle into what works for you. Make it easy so you can enjoy what you do.
Get Further Beneath The Folds
-

How Do I Prepare For Textile Art Creation?
-

How To Create Skin in Textile Art
-

Creating A Working Environment | Textile Art